Search the Community
Showing results for tags 'image edit'.
-
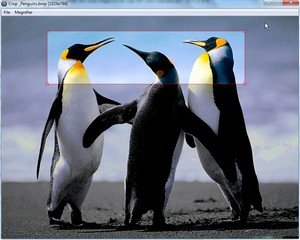
This is a visual Crop Tool, Version 1.0.0.5 Load the image in the Crop GUIMove the cross-hair to the upper left corner where to start croppingMark the rectangle with left mouse button, releaseAdjust the position with left mouse, release (right mouse = start over)Press enterImage is saved in same folder, same format, with '_cr' added to file nameAs simple as that. Updated script, Visual Crop UDF 1.0.0.4 examples.au3 Visual Crop UDF 1.0.0.4.au3 (No obscuration of non-selected area) Visual Crop UDF 1.0.0.5.au3 (with obscuration) Ver 1.0.0.1 Avoid trespassing the edge of the GUI while selecting the crop area.Ver 1.0.0.4 Mark crop area in any directionResizing Corner grabbers (use with Ctrl Left Mouse button)Mouse cursor changes over move and resizing corner grabbersRedraw when left mouse clicking outside of crop area (restart crop), right Mouse click, same result.Magnifier de-/selectable with Ctrl-M or F2. (original function by Melba23) Note: without image ratio: Magnifier remains visible till the crop area has been marked with image ratio: Magnifier is only visible until the rectangle appears, first corner has been marked. Ver 1.0.0.5 Obscure non crop area, did some hard thinking and found my way... Missing still: ?Enjoy GreenCan Related:
-
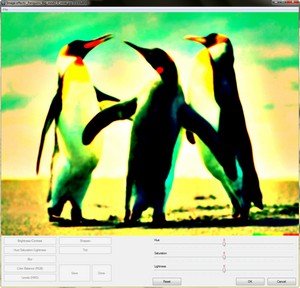
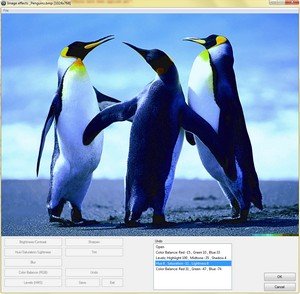
Following to my Image Crop Tool, this is a new function to visually apply effects on an image Version 1.0.0.1 Visual Image Effect UDF 1.0.0.1.au3 Features: Brightness/ContrastHue/Saturation/LightnessBlurColor Balance (RGB)Levels (HMS)SharpenTintUndo (New)Similarly to _CropImage(), _ImageEffects(() will scale the image down to get it visible on screen, all effects are implemented and stacked into an Effects History array, and replicated to the original image while saving. Clicking the OK button after having moved the sliders, implements the filter! Some particularities: Blur and Sharpen effects give different results with the same radius, this issue has been taken into account. The maximum radius of 255 will therefore be limited if using a scaled image, so that the final effect is guaranteed the same on screen as on the bigger sized image file. (see $h_Blur_Btn and $h_Sharpen_Btn and in _SaveLossless() how I rescale the Radius to get it right in the big image) The function saves to images for demo purpose _SaveClone() will save the image displayed into the GUI (You can remove this line as only for demo purpose)_SaveLossless() will save the original sized image with all applied effectsYou will see that the result is identical on both created image files. BugFixes: After applying a filter, I forgot to reset the filter values, fixedEnjoy PS as from tomorrow, I will be offline for a week... Related:


