Leaderboard
Popular Content
Showing content with the highest reputation on 01/15/2024 in all areas
-
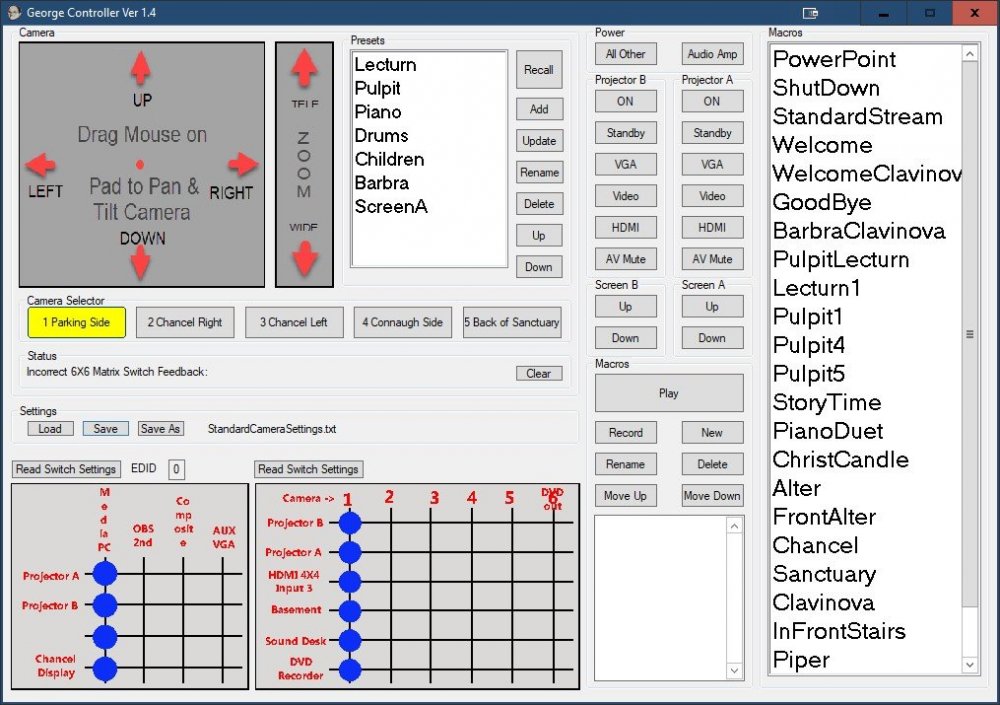
Attached is a full Controller for SONY Cameras using the VISCA protocol, written in AutoIt. Everything required to build a EXE file is included. I wrote this software because I couldn't find decent control software for these cameras, I tried at least a dozen packages. So in my mind, anyway, it is better than anything else out there. The software will also controls several other pieces of AV equipment. The software is very specific to my application but should be easy to adapt and would make a good starting point for someone else trying to roll there own Audio Video control program. It features the following; Unlimited number of presets Macros to combine recall of presets Supports JoyStick control Supports up to 7 cameras in Daisy chain configuration. Unique Pan Tilt control pad provides variable speed control by dragging Mouse on pad, makes the cameras easy to control. Web Server allows Macros to be activated from OBS Studio Modular structure should make the code adaptable to other camera control protocols. Modular structure should make additional hardware support easy to add or remove. Will show errors during start up if hardware is not present but it will run. Serial ports configured with included INI file. Joystick response can be adjusted through settings in the INI file. Lots of documentation on how things are setup in the various source modules. Built in web server allows control from OBS Studio. Lots more documentation available wiring instructions, protocol documents for hardware etc. but that would exceed file upload size. PM me if you are interested. And thanks to everyone on this forum that provided the many libraries and bits of software used to make this project work. I couldn't have done it without the many contributors to this forum. I did my best to give the appropriate credit in each module. GeorgeController.zip Operation Instructions.pdf1 point
-
This is possible if to use WinAPI See example in help file for _WinAPI_DragQueryFileEx()1 point
-
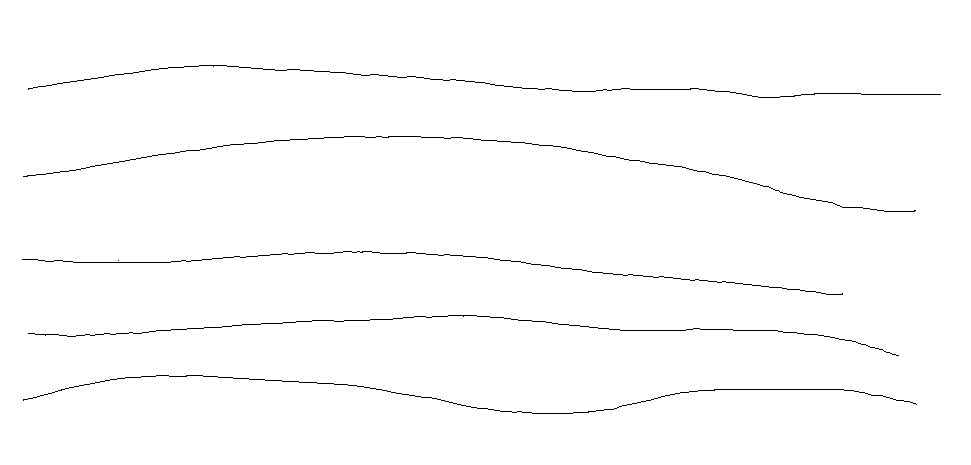
Hi. I wanted to share an algorithm I found online that I thought was neat, so I have ported it over from Python to Autoit. (If I am not quite sure If I can link to external sites on this forum, so if you're interested in the website I have got this math from, feel free to PM me.) The code makes a cursor move realistically by simulating gravity pulling the cursor to a point and wind making it move unpredictably. The cursor speeds up from far away, slows down as it gets closer, and stops when it's close enough. Here is what human mouse movement recorded in Gimp looks like : And here are some random examples of what the code can produce on default parameters : The following is the mouse movement function, use it however you will, but please do not discuss game automation in this thread or contact me about anything having to do with such. (this is against forum rules) Hope someone finds some good use for this. Happy new years. #include <Math.au3> #include <Array.au3> MoveMouse(297, 551,1305,341) Func MoveMouse($start_x, $start_y, $dest_x, $dest_y, $G_0 = 9, $W_0 = 3, $M_0 = 15, $D_0 = 12) Local $current_x = $start_x, $current_y = $start_y Local $v_x = 0, $v_y = 0, $W_x = 0, $W_y = 0 While _Dist($dest_x, $dest_y, $start_x, $start_y) >= 1 Local $dist = _Dist($dest_x, $dest_y, $start_x, $start_y) Local $W_mag = Min($W_0, $dist) If $dist >= $D_0 Then $W_x = $W_x / Sqrt(3) + (2 * Random() - 1) * $W_mag / Sqrt(5) $W_y = $W_y / Sqrt(3) + (2 * Random() - 1) * $W_mag / Sqrt(5) Else $W_x /= Sqrt(3) $W_y /= Sqrt(3) If $M_0 < 3 Then $M_0 = Random() * 3 + 3 Else $M_0 /= Sqrt(5) EndIf EndIf $v_x += $W_x + $G_0 * ($dest_x - $start_x) / $dist $v_y += $W_y + $G_0 * ($dest_y - $start_y) / $dist Local $v_mag = _Dist(0, 0, $v_x, $v_y) If $v_mag > $M_0 Then Local $v_clip = $M_0 / 2 + Random() * $M_0 / 2 $v_x = ($v_x / $v_mag) * $v_clip $v_y = ($v_y / $v_mag) * $v_clip EndIf $start_x += $v_x $start_y += $v_y Local $move_x = Round($start_x) Local $move_y = Round($start_y) If $current_x <> $move_x Or $current_y <> $move_y Then MouseMove($move_x,$move_y,1) ConsoleWrite("Move Mouse to: " & $move_x & ", " & $move_y & @CRLF) $current_x = $move_x $current_y = $move_y EndIf WEnd Return $current_x & "," & $current_y EndFunc ; Calculate distance between two points Func _Dist($x1, $y1, $x2, $y2) Return Sqrt(($x2 - $x1) ^ 2 + ($y2 - $y1) ^ 2) EndFunc Func Min($a, $b) If $a < $b Then Return $a Else Return $b EndIf EndFunc1 point
-
Anthony72, This seems to do what you want: #include <GuiListBox.au3> #include <Date.au3> #include <GUIConstantsEx.au3> #include <WindowsConstants.au3> #include <AutoItConstants.au3> #include <StaticConstants.au3> #include <UpDownConstants.au3> #include <EditConstants.au3> #include <File.au3> #include <Misc.au3> #include <String.au3> #include <Array.au3> #include "GUIListViewEx.au3" ;#include ".\GUIListViewEx\GUIListViewEx.au3" ;~ Global $sRet, $aRetMem $hGUI = GUICreate("ListView Example_6 Light", 660, 330) ; Create ListView GUICtrlCreateLabel("ComboBox - $vRow, $vCol for edit ComboBox (RJ-45) etc...", 10, 10, 400, 20) $cLV_1 = GUICtrlCreateListView("Country|Reference|Not use|Not use", 10, 30, 640, 260, BitOR($LVS_SINGLESEL, $LVS_SHOWSELALWAYS)) _GUICtrlListView_SetExtendedListViewStyle($cLV_1, BitOR($LVS_EX_FULLROWSELECT, $LVS_EX_HEADERDRAGDROP)) For $i = 0 To 3 _GUICtrlListView_SetColumnWidth($cLV_1, $i, 158) Next ; Create Cols & Rows ; Créer des Colonnes et des Lignes Global $vCols = 6, $vRows = 4 ; Create array and fill listview Global $aLVArray_1[$vCols][$vRows] $sData = "RJ-45 color order USA|Blue,Green,Orange,Brown" $aLVArray_1[0][0] = $sData GUICtrlCreateListViewItem($sData, $cLV_1) $sData = "Standard TV USA|NTSC" $aLVArray_1[1][0] = $sData GUICtrlCreateListViewItem($sData, $cLV_1) ; Initiate ListView = sort on column click - editable headers $iLVIndex_1 = _GUIListViewEx_Init($cLV_1, $aLVArray_1, 0, 0, True, 1 + 8 + 32) ; + 16 ; Set column edit status _GUIListViewEx_SetEditStatus($iLVIndex_1, "0", 9, _Combo_Edit) ; Call function when double clicked _GUIListViewEx_SetEditStatus($iLVIndex_1, "1", 9, _Combo_Edit) $cContent = GUICtrlCreateButton("Content", 100, 295, 80, 30) $cHeaders = GUICtrlCreateButton("Headers", 300, 295, 80, 30) _GUIListViewEx_MsgRegister() GUISetState() While 1 $iMsg = GUIGetMsg() Switch $iMsg Case $GUI_EVENT_CLOSE Exit Case $cContent $aRet = _GUIListViewEx_ReturnArray($iLVIndex_1) _ArrayDisplay($aRet, "", Default, 8) Case $cHeaders $aRet = _GUIListViewEx_ReturnArray($iLVIndex_1, 4) _ArrayDisplay($aRet, "", Default, 8) EndSwitch $vRet = _GUIListViewEx_EventMonitor() If @error Then MsgBox($MB_SYSTEMMODAL, "Error", "Event error: " & @error) EndIf Switch @extended Case 0 ; No event detected Case 1 If $vRet = "" Then ;~ MsgBox($MB_SYSTEMMODAL, "Edit", "Edit aborted" & @CRLF) Else _ArrayDisplay($vRet, "ListView " & _GUIListViewEx_GetActive() & " content edited", Default, 8) EndIf Case 2 If $vRet = "" Then MsgBox($MB_SYSTEMMODAL, "Header edit", "Header edit aborted" & @CRLF) Else _ArrayDisplay($vRet, "ListView " & _GUIListViewEx_GetActive() & " header edited", Default, 8) EndIf Case 3 MsgBox($MB_SYSTEMMODAL, "Sorted", "ListView: " & $vRet & @CRLF) Case 4 Local $aRet = StringSplit($vRet, ":") MsgBox($MB_SYSTEMMODAL, "Dragged", "From ListView " & $aRet[1] & @CRLF & "To ListView " & $aRet[2]) EndSwitch WEnd Func _Combo_Edit($hLV, $iIndexLV, $iRow, $iCol) Local $sCombo_Fill ; Select correct combo fill depending on row/col Switch $iRow Case 0 Switch $iCol Case 0 $sCombo_Fill = "RJ-45 color order USA|RJ-45 color order EUROPE" Case 1 $sCombo_Fill = "Blue,Green,Orange,Brown|Blue,Orange,Green,Brown" EndSwitch Case 1 Switch $iCol Case 0 $sCombo_Fill = "Standard TV USA|Standard TV EUROPE" Case 1 $sCombo_Fill = "NTSC|Pal/Secam/NTSC" EndSwitch EndSwitch ; Create combo dialog $hCombo_Dialog = GUICreate("Edit", 200, 30) $cCombo = GUICtrlCreateCombo("", 0, 0, 200, 20) ; Fill combo with required elements GUICtrlSetData($cCombo, $sCombo_Fill, _GUICtrlListView_GetItemText($hLV, $iRow, $iCol)) GUISetState() While 1 Switch GUIGetMsg() Case $GUI_EVENT_CLOSE GUIDelete($hCombo_Dialog) Return Case $cCombo ExitLoop EndSwitch WEnd ; Change ListView element to match selection _GUIListViewEx_ChangeItem($iIndexLV, $iRow, $iCol, GUICtrlRead($cCombo)) GUIDelete($hCombo_Dialog) EndFunc This is just a very basic example. The combo data selection is a little clunky - I would suggest that it would be more elegant to create an array so that you can get the required data directly using the row/column passed to the function. And you will need to create the dialog with a little more care - such as disabling the main GUI while it is displayed. I hope that points you in the right direction. M231 point
-
; https://www.autoitscript.com/forum/topic/139260-autoit-snippets/page/25/#comment-1529091 ;---------------------------------------------------------------------------------------- ; Title...........: ShellTrayRefresh.au3 ; Description.....: Refreshes ShellTray to remove leftover zombie icons ; AutoIt Version..: 3.3.16.1 Author: ioa747 ; Note............: Testet in Win10 22H2 ;---------------------------------------------------------------------------------------- #AutoIt3Wrapper_Au3Check_Parameters=-d -w 1 -w 2 -w 3 -w 4 -w 5 -w 6 -w 7 #NoTrayIcon Sleep(1000) ShellTrayRefresh() ;---------------------------------------------------------------------------------------- Func ShellTrayRefresh() Local $aStartPos = MouseGetPos() Local $hTrayWnd = WinGetHandle("[CLASS:Shell_TrayWnd]") Local $hTlb = ControlGetHandle($hTrayWnd, "", "ToolbarWindow324") Local $hBtn = ControlGetHandle($hTrayWnd, "", "Button2") Local $aPos = ControlGetPos($hTrayWnd, "", $hBtn) Local $aTPos = ControlGetPos($hTrayWnd, "", $hTlb) For $i = ($aPos[0] - 1) + ($aPos[2] / 2) To $aPos[0] + $aPos[2] + $aTPos[2] Step $aPos[2] MouseMove($i, @DesktopHeight - 4, 1) ;ConsoleWrite("$i=" & $i & @CRLF) Next MouseMove($aStartPos[0], $aStartPos[1], 1) EndFunc ;==>ShellTrayRefresh ;---------------------------------------------------------------------------------------- Func ShellTrayRefresh2() Local $aStartPos = MouseGetPos() Local $hTrayWnd = WinGetHandle("[CLASS:Shell_TrayWnd]") Local $hBtn = ControlGetHandle($hTrayWnd, "", "Button2") Local $aPos = ControlGetPos($hTrayWnd, "", $hBtn) For $i = $aPos[0] To @DesktopWidth Step 10 MouseMove($i, @DesktopHeight - 4, 1) ;ConsoleWrite("$i=" & $i & @CRLF) Next MouseMove($aStartPos[0], $aStartPos[1], 1) EndFunc ;==>TrayToolBarRefresh ;---------------------------------------------------------------------------------------- Edit: some change was made to the windows and the "ToolbarWindow323" now became "ToolbarWindow324" For this I also put a blind version extra (slower but more resistant to such changes)1 point
-
You're welcome.1 point
-
I created a little innoscript for you with which you can add an .a3x file, a starter .cmd and the suitable AutoIt.exe into a Setup. I extracted the code from one of my much more comprehensive scripts, but it should fit. I still use the Inno Setup Software 5.6.1. (there is a newer one available). -> Install the current version of Inno-Setup and create a project directory (e.g. c:\Innoprojects\MyTool) -> Copy the attached .zip file into this directory and unzip it there. -> Open MyTool.iss with the Inno-Editor and click on BUILD -> COMPILE (CTRL + F9) ==> The result is a setup file that installs (more precisely copies) the relevant files into a directory of your choice. ==> The AutoIt script 'MyTool' itself is just a dummy application and serves only for demonstration purposes. I named the project 'MyTool', but you can change the name and the .bmp's to whatever you like. If you still have questions, you are welcome to write me a PM (others of course as well). Maybe it would even be better to create an own thread in a more suitable forum area. Testfiles.zip1 point
-
@wisem2540 Basic4Android (B4A) might be worth taking a look into. It's sort of like the old VB6 development environment, but for Android. It has a feature-rich, WYSIWYG development environment and a very active community. The language is very similar to AutoIt in many respects. That means you can spend more time learning the specifics of Android programming and less time learning the language and the development environment. It used to be free but I think they charge a nominal fee now. They also have B4I (IOS), B4J (Desktop), and B4R (Arduino) if you choose to expand onto other platforms.1 point


