Leaderboard
Popular Content
Showing content with the highest reputation on 08/12/2021 in all areas
-

Calculation Mistakes in Large Arrays
seadoggie01 and 2 others reacted to Earthshine for a topic
it's not the number of lines you write, it's what they do. C and C++ are FAR superior to what the OP is doing and not using the appropriate language is a huge mistake and waste of time/energy/money the argument that you "get more done" is completely false. If you focus on C++ you will become expert in no time and whipping out solutions will be as fast or faster than using an autmation scripting tool. Basically, in a nutshell--USE THE RIGHT TOOL FOR THE JOB. If speed and accuracy are your main considerations then don't use an interpreted language at all. but if you must use AutoIt then use the UDF that @RTFC created.3 points -
I wanted to use OpenCV v4+ in AutoIt. I found Opencv UDF on the forum, but there was no support for OpenCV v4+ This UDF provides support for OpenCV v4+ Update There is a new implementation using COM. It is almost as easy as python to use It is also possible to interact with GDI+ Download and extract opencv-4.12.0-windows.exe into a folder Download and extract autoit-opencv-4.12.0-com-v2.8.0.7z into a folder Sources Here Documentation A generated documentation for functions is available here (v2.8.0) Examples More samples can be found here (v2.8.0) To run them, please follow these instructions (v2.8.0) Showing an image #Region ;**** Directives created by AutoIt3Wrapper_GUI **** #AutoIt3Wrapper_UseX64=y #EndRegion ;**** Directives created by AutoIt3Wrapper_GUI **** #include "autoit-opencv-com\udf\opencv_udf_utils.au3" _OpenCV_Open("opencv-4.12.0-windows\opencv\build\x64\vc16\bin\opencv_world4120.dll", "autoit-opencv-com\autoit_opencv_com4120.dll") OnAutoItExitRegister("_OnAutoItExit") Example() Func Example() Local $cv = _OpenCV_get() If Not IsObj($cv) Then Return Local $img = _OpenCV_imread_and_check(_OpenCV_FindFile("samples\data\lena.jpg")) $cv.imshow("Image", $img) $cv.waitKey() $cv.destroyAllWindows() EndFunc ;==>Example Func _OnAutoItExit() _OpenCV_Close() EndFunc ;==>_OnAutoItExit Drawing contours #Region ;**** Directives created by AutoIt3Wrapper_GUI **** #AutoIt3Wrapper_UseX64=y #EndRegion ;**** Directives created by AutoIt3Wrapper_GUI **** #include "autoit-opencv-com\udf\opencv_udf_utils.au3" _OpenCV_Open("opencv-4.12.0-windows\opencv\build\x64\vc16\bin\opencv_world4120.dll", "autoit-opencv-com\autoit_opencv_com4120.dll") OnAutoItExitRegister("_OnAutoItExit") Example() Func Example() Local $cv = _OpenCV_get() If Not IsObj($cv) Then Return Local $img = _OpenCV_imread_and_check("samples\data\pic1.png") Local $img_grey = $cv.cvtColor($img, $CV_COLOR_BGR2GRAY) $cv.threshold($img_grey, 100, 255, $CV_THRESH_BINARY) Local $thresh = $cv.extended[1] Local $contours = $cv.findContours($thresh, $CV_RETR_TREE, $CV_CHAIN_APPROX_SIMPLE) ConsoleWrite("Found " & UBound($contours) & " contours" & @CRLF & @CRLF) $cv.drawContours($img, $contours, -1, _OpenCV_Scalar(0, 0, 255), 2) $cv.imshow("Image", $img) $cv.waitKey() $cv.destroyAllWindows() EndFunc ;==>Example Func _OnAutoItExit() _OpenCV_Close() EndFunc ;==>_OnAutoItExit Showing an image in autoit GUI #Region ;**** Directives created by AutoIt3Wrapper_GUI **** #AutoIt3Wrapper_UseX64=y #EndRegion ;**** Directives created by AutoIt3Wrapper_GUI **** #include "autoit-opencv-com\udf\opencv_udf_utils.au3" #include <GUIConstantsEx.au3> _OpenCV_Open("opencv-4.12.0-windows\opencv\build\x64\vc16\bin\opencv_world4120.dll", "autoit-opencv-com\autoit_opencv_com4120.dll") OnAutoItExitRegister("_OnAutoItExit") Example() Func Example() Local $cv = _OpenCV_get() If Not IsObj($cv) Then Return #Region ### START Koda GUI section ### Form= Local $FormGUI = GUICreate("show image in autoit gui", 400, 400, 200, 200) Local $Pic = GUICtrlCreatePic("", 0, 0, 400, 400) GUISetState(@SW_SHOW) #EndRegion ### END Koda GUI section ### Local $img = _OpenCV_imread_and_check(_OpenCV_FindFile("samples\data\lena.jpg")) _OpenCV_imshow_ControlPic($img, $FormGUI, $Pic) Local $nMsg While 1 $nMsg = GUIGetMsg() Switch $nMsg Case $GUI_EVENT_CLOSE ExitLoop EndSwitch WEnd $cv.destroyAllWindows() EndFunc ;==>Example Func _OnAutoItExit() _OpenCV_Close() EndFunc ;==>_OnAutoItExit Showing an image in an autosized autoit GUI #Region ;**** Directives created by AutoIt3Wrapper_GUI **** #AutoIt3Wrapper_UseX64=y #EndRegion ;**** Directives created by AutoIt3Wrapper_GUI **** #include "autoit-opencv-com\udf\opencv_udf_utils.au3" #include <GUIConstantsEx.au3> _OpenCV_Open("opencv-4.12.0-windows\opencv\build\x64\vc16\bin\opencv_world4120.dll", "autoit-opencv-com\autoit_opencv_com4120.dll") OnAutoItExitRegister("_OnAutoItExit") Example() Func Example() Local $cv = _OpenCV_get() If Not IsObj($cv) Then Return #Region ### START Koda GUI section ### Form= Local $FormGUI = GUICreate("show image in autoit gui [WINDOW_AUTOSIZE]", 400, 400, 200, 200) Local $Pic = GUICtrlCreatePic("", 0, 0, 400, 400) GUISetState(@SW_SHOW) #EndRegion ### END Koda GUI section ### Local $img = _OpenCV_imread_and_check(_OpenCV_FindFile("samples\data\lena.jpg")) ; get the image size and resize the GUI and the PIC control WinMove($FormGUI, "", Default, Default, $img.width, $img.height) GUICtrlSetPos($Pic, Default, Default, $img.width, $img.height) _OpenCV_imshow_ControlPic($img, $FormGUI, $Pic) Local $nMsg While 1 $nMsg = GUIGetMsg() Switch $nMsg Case $GUI_EVENT_CLOSE ExitLoop EndSwitch WEnd $cv.destroyAllWindows() EndFunc ;==>Example Func _OnAutoItExit() _OpenCV_Close() EndFunc ;==>_OnAutoItExit Screen capture #Region ;**** Directives created by AutoIt3Wrapper_GUI **** #AutoIt3Wrapper_UseX64=y #EndRegion ;**** Directives created by AutoIt3Wrapper_GUI **** #include "autoit-opencv-com\udf\opencv_udf_utils.au3" _OpenCV_Open("opencv-4.12.0-windows\opencv\build\x64\vc16\bin\opencv_world4120.dll", "autoit-opencv-com\autoit_opencv_com4120.dll") OnAutoItExitRegister("_OnAutoItExit") Example() Func Example() Local $cv = _OpenCV_get() If Not IsObj($cv) Then Return Local $iLeft = 200 Local $iTop = 200 Local $iWidth = 400 Local $iHeight = 400 Local $aRect[4] = [$iLeft, $iTop, $iWidth, $iHeight] Local $img = _OpenCV_GetDesktopScreenMat($aRect) $cv.imshow("Screen capture", $img) $cv.waitKey() $cv.destroyAllWindows() EndFunc ;==>Example Func _OnAutoItExit() _OpenCV_Close() EndFunc ;==>_OnAutoItExit Find template #Region ;**** Directives created by AutoIt3Wrapper_GUI **** #AutoIt3Wrapper_UseX64=y #EndRegion ;**** Directives created by AutoIt3Wrapper_GUI **** #include "autoit-opencv-com\udf\opencv_udf_utils.au3" _OpenCV_Open("opencv-4.12.0-windows\opencv\build\x64\vc16\bin\opencv_world4120.dll", "autoit-opencv-com\autoit_opencv_com4120.dll") OnAutoItExitRegister("_OnAutoItExit") Example() Func Example() Local $cv = _OpenCV_get() If Not IsObj($cv) Then Return Local $img = _OpenCV_imread_and_check(_OpenCV_FindFile("samples\data\mario.png")) Local $tmpl = _OpenCV_imread_and_check(_OpenCV_FindFile("samples\data\mario_coin.png")) ; The higher the value, the higher the match is exact Local $threshold = 0.8 Local $aMatches = _OpenCV_FindTemplate($img, $tmpl, $threshold) Local $aRedColor = _OpenCV_RGB(255, 0, 0) Local $aMatchRect[4] = [0, 0, $tmpl.width, $tmpl.height] For $i = 0 To UBound($aMatches) - 1 $aMatchRect[0] = $aMatches[$i][0] $aMatchRect[1] = $aMatches[$i][1] ; Draw a red rectangle around the matched position $cv.rectangle($img, $aMatchRect, $aRedColor) Next $cv.imshow("Find template example", $img) $cv.waitKey() $cv.destroyAllWindows() EndFunc ;==>Example Func _OnAutoItExit() _OpenCV_Close() EndFunc ;==>_OnAutoItExit Video capture file #Region ;**** Directives created by AutoIt3Wrapper_GUI **** #AutoIt3Wrapper_UseX64=y #EndRegion ;**** Directives created by AutoIt3Wrapper_GUI **** #include "autoit-opencv-com\udf\opencv_udf_utils.au3" #include <Misc.au3> _OpenCV_Open("opencv-4.12.0-windows\opencv\build\x64\vc16\bin\opencv_world4120.dll", "autoit-opencv-com\autoit_opencv_com4120.dll") OnAutoItExitRegister("_OnAutoItExit") Example() Func Example() Local $cv = _OpenCV_get() If Not IsObj($cv) Then Return Local $cap = _OpenCV_ObjCreate("cv.VideoCapture").create(_OpenCV_FindFile("samples\data\vtest.avi")) If Not $cap.isOpened() Then ConsoleWriteError("!>Error: cannot open the video file." & @CRLF) Exit EndIf Local $frame = _OpenCV_ObjCreate("cv.Mat") While 1 If _IsPressed("1B") Or _IsPressed(Hex(Asc("Q"))) Then ExitLoop EndIf If Not $cap.read($frame) Then ConsoleWriteError("!>Error: cannot read the video or end of the video." & @CRLF) ExitLoop EndIf $cv.imshow("capture video file", $frame) Sleep(30) WEnd $cv.destroyAllWindows() EndFunc ;==>Example Func _OnAutoItExit() _OpenCV_Close() EndFunc ;==>_OnAutoItExit Video capture camera #Region ;**** Directives created by AutoIt3Wrapper_GUI **** #AutoIt3Wrapper_UseX64=y #EndRegion ;**** Directives created by AutoIt3Wrapper_GUI **** #include "autoit-opencv-com\udf\opencv_udf_utils.au3" #include <Misc.au3> _OpenCV_Open("opencv-4.12.0-windows\opencv\build\x64\vc16\bin\opencv_world4120.dll", "autoit-opencv-com\autoit_opencv_com4120.dll") OnAutoItExitRegister("_OnAutoItExit") Example() Func Example() Local $cv = _OpenCV_get() If Not IsObj($cv) Then Return Local $iCamId = 0 Local $cap = _OpenCV_ObjCreate("cv.VideoCapture").create($iCamId) If Not $cap.isOpened() Then ConsoleWriteError("!>Error: cannot open the camera." & @CRLF) Exit EndIf Local $frame = _OpenCV_ObjCreate("cv.Mat") While 1 If _IsPressed("1B") Or _IsPressed(Hex(Asc("Q"))) Then ExitLoop EndIf If $cap.read($frame) Then ;; Flip the image horizontally to give the mirror impression $frame = $cv.flip($frame, 1) $cv.imshow("capture camera", $frame) Else ConsoleWriteError("!>Error: cannot read the camera." & @CRLF) EndIf Sleep(30) WEnd $cv.destroyAllWindows() EndFunc ;==>Example Func _OnAutoItExit() _OpenCV_Close() EndFunc ;==>_OnAutoItExit Resize an image with GDI+ #Region ;**** Directives created by AutoIt3Wrapper_GUI **** #AutoIt3Wrapper_UseX64=y #EndRegion ;**** Directives created by AutoIt3Wrapper_GUI **** #include "autoit-opencv-com\udf\opencv_udf_utils.au3" _OpenCV_Open("opencv-4.12.0-windows\opencv\build\x64\vc16\bin\opencv_world4120.dll", "autoit-opencv-com\autoit_opencv_com4120.dll") _GDIPlus_Startup() OnAutoItExitRegister("_OnAutoItExit") Example() Func Example() Local $cv = _OpenCV_get() If Not IsObj($cv) Then Return Local $bMethod = 1 Local $img = _OpenCV_imread_and_check(_OpenCV_FindFile("samples\tutorial_code\yolo\scooter-5180947_1920.jpg")) Local $resized If $bMethod Then $resized = $img.GdiplusResize(600, 400) Else Local $hImage = $img.convertToBitmap() Local $hResizedImage = _GDIPlus_ImageResize($hImage, 600, 400) _GDIPlus_BitmapDispose($hImage) $resized = $cv.createMatFromBitmap($hResizedImage) _GDIPlus_BitmapDispose($hResizedImage) EndIf $cv.imshow("Resized with GDI+", $resized) $cv.waitKey() $cv.destroyAllWindows() EndFunc ;==>Example Func _OnAutoItExit() _GDIPlus_Shutdown() _OpenCV_Close() EndFunc ;==>_OnAutoItExit1 point
-

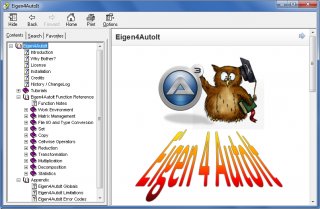
Eigen4AutoIt - Matrix computing with Eigen
Earthshine reacted to RTFC for a topic
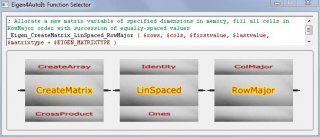
The Eigen C++ template library is a great environment for matrix computing; it is fast, reliable, extensive, and well-documented. It is also completely free, and does not rely on any external dependencies. Unfortunately for AutoIt users, the term “template library” implies that any functions you call are only instantiated upon compilation (in C++). That means there's nothing to hook into. To make Eigen ’s most important functionality directly accessible from within AutoIt scripts (version 3.3.14+, download it here), I developed the Eigen4AutoIt environment. It runs on Windows and under Wine also on Linux and Mac (Ubuntu, Debian, Fedora, and MacOS supported by WineHQ), and SUSE, Slackware, and FreeBSD supported by the distros). >Download the latest version It consists of: 1) Eigen4AutoIt.au3 an AutoIt library of wrapper functions that contain extensive bounds checks, matrix management, file I/O, type conversion, and precision control, and two-way data exchange with files and native AutoIt arrays; 2) Eigen-wrapper dlls (EigenDense.dll, EigenDense_x64.dll) re-maps matrices created in AutoIt as Eigen Matrix objects, then calls Eigen’s powerful core functions; in the spirit of open-source, the full C++ source code I wrote is included in the bundle (see subdirectory "source"). The basic functions consist of a single Eigen call; decompositions and statistics are more involved. 3) Additional materials: the user-interactive, animated Function Selector and MatrixViewer tools the MatrixFileConverter to read/write E4A matrices from/to .csv ASCII, Excel, and Xbase files. three libraries of scientific and mathematical constants online Help, with example code for every function Quickstart Manual (11-page pdf, updated) Test suite Tutorials from Basics to Advanced Please note: none of this is part of Eigen's own distribution you only need this bundle; you do not need to install Eigen. How it works: No matrix content is ever transferred, only memory pointers, meaning computations in AutoIt are virtually as fast as in Eigen’s native environment, with the added advantage of not having to be compiled first. The drawback is that Eigen's native ad-hoc expression templates (and their internal optimisations) cannot be exploited here; you have to construct your operations with the basic building blocks. These provide matrix creation, I/O, cellwise operations, reduction, multiplication, transformation, decomposition (LU, Householder, Choleski, and Jacobi SVD; these include general linear solvers) and a small statistics module by yours truly. IMPORTANT: Posting Rules for this thread: 1) Do not post or PM me any matrix-, maths-, or Eigen-related questions. Eigen has its own User Forum for that (or try math.stackExchange.com). I am not your maths guru! If you post such questions, I will either ignore your post or remind you of this rule. 2) Do not post or PM me your data sets and/or non-working Eigen4AutoIt scripts; I will not analyse your data or fix your scripts for you! There are many reasons why a linear algebra procedure might fail to produce the answer you expect. You are wielding great mathematical power here, so exploit the fantastic internet resources at your fingertips and learn how to use it. To get you started, I've listed a few video tutorials and other helpful materials in the header remarks of Eigen4AutoIt.au3. Also check out the test scripts, the Tutorials, and the Help file. 3) I do warmly welcome all of the following: remarks, advice, suggestions for improvements, encouragement, cash; bug reports re. the Eigen4AutoIt interface (individual functions that don't work the way they should) and/or the associated dll code (ditto); your own working Eigen4AutoIt templates of general use that you'd like to see implemented in a future release. Regarding that last item, have a look at my PCA tutorial. After the step-by-step stage, I summarise the entire procedure in a "mini script" of Eigen4AutoIt calls. Then I introduce the two internal PCA functions I developed, which replace that script with two simple calls. You can do the same thing, and submit your own functional Eigen4AutoIt script in this thread. If I consider it of general use and can implement it, it may become a new Eigen4AutoIt function in the next release (with source acknowledgement, of course). This means that you'd get a precompiled dll version of your script that will likely run faster and be simpler to call. Thereby this thread would become an Eigen4AutoIt Example Scripts mini forum. It's just a thought. >Download the latest version (uncompressed size: 36.1 MB) How to Install You need AutoIt version 3.3.14 or later. Simply run the installer, navigate to the tutorial subdirectory, open the first tutorial ("Basics") in Scite, and start it. This shows basic matrix I/O and mode switching (single versus double precision). If that runs, you're in business. NB to leverage the full power of x64 features, you'll also need to have the full Scite4AutoIt3 package installed. For more info, see sections "Bitness" and "Shared Memory" in the Help, main topic: "Work Environment" page.1 point -
@Lion66 I found a way to get the center of a polygons ; draw a circle at the center Local $moments = _cveMomentsCreate() _cveMoments($i_arr_dst_32, False, $moments) Local $cx = _cveMomentsGetM10($moments) / _cveMomentsGetM00($moments) Local $cy = _cveMomentsGetM01($moments) / _cveMomentsGetM00($moments) _cveCircleMat($img2, _cvPoint($cx, $cy), 5, _cvScalar(255, 255, 255), $CV_FILLED) _cveMomentsRelease($moments) The code with ORB added and the above code added 160732-opencv-udf.au31 point
-
1 point
-
I'd like to recommend to "bundle" STDERR" and "STDOUT" $Exe="E:\ffprobe.exe" $Params=" -v error -show_entries format=duration -of default=noprint_wrappers=1:nokey=1 t:\111.mp4" $PID = Run($Exe & $Params,@TempDir,@SW_SHOW,$STDERR_MERGED) While ProcessExists ($PID) Sleep(500) WEnd $Result=StdoutRead($PID) MsgBox(0, '', $Result) As ffprobe.exe seems to be a command line tool it should be possible to paralellize the processing, QND and not tested at all, derived from some other script, just to give you a start: #include <Debug.au3> #include <File.au3> $aMP4 = _FileListToArrayRec("C:\temp", "*.MP4", 1, 1, 0, 2) _DebugArrayDisplay($aMP4) $Exe = "E:\ffprobe.exe" $Str4ArrayAdd = "" For $i = 1 To $aMP4[0] $Params = ' -v error -show_entries format=duration -of default=noprint_wrappers=1:nokey=1 "' & $aMP4[$i] & '"' $PID = Run($Exe & $Params, @TempDir, @SW_SHOW, $STDERR_MERGED) $Str4ArrayAdd &= $PID & "|" & $aMP4[$i] & @CRLF Next ; cut off final @crlf $Str4ArrayAdd = StringTrimRight($Str4ArrayAdd, 2) Dim $a2MP4andPID[1][2] _ArrayAdd($a2MP4andPID, $Str4ArrayAdd) $a2MP4andPID[0][0] = UBound($a2MP4andPID) - 1 $StrResult = "" Do $ProcCount = 0 For $p = UBound($a2MP4andPID) - 1 To 1 Step -1 If ProcessExists($a2MP4andPID[$p][0]) Then $ProcCount += 1 Else $result = StdoutRead($PID) $StrResult &= $result & "|" & $a2MP4andPID[$p][1] & @CRLF _ArrayDelete($a2MP4andPID, $p) EndIf Next ToolTip($ProcCount & " Processes remaining...", 100, 100) Until $ProcCount = 0 ToolTip("") $StrResult = StringTrimRight($StrResult, 2) Dim $a2Results[1][2] _ArrayAdd($a2Results, $StrResult) $a2Results[0][0] = UBound($a2Results) - 1 _ArraySort($a2Results, 1, 1) ; sort descending by size _DebugArrayDisplay($a2Results)1 point
-
TylerRoss, Do not worry - I am sure someone will be along soon to offer you a nice study package for not too much money..... M231 point
-
Hi @Lion66 Thanks for the feedback and the encouragement. I though that KAZE did not have detectAndCompute implemented, but it is NORM_HAMMING and NORM_HAMMING2 that are not compatible with KAZE. I will update the example to take that into account. I was testing with BRISK and I had no matches, while with KAZE I have similar results as your python script. See the attached file. I don't have that error. Can you check your value of $OPENCV_SAMPLES_DATA_PATH ? The examples are designed to work inside the repository. As describe in these instructions, can you clone the whole repo, and try again ? Are you talking about the file matching_homography_Demo.au3 ? If yes, it is already at the end of the cycle. Are you refering to another file? The message label can be changed to "no matches found." in case of no matches. However I don't understand the need of clearing then GUI. $img_matches is always a new image. Can you describe a test case where clearing the GUI might help? 160732-opencv-udf.au31 point
-

Calculation Mistakes in Large Arrays
FrancescoDiMuro reacted to RTFC for a topic
and (at the fear of repeating myself) E4A relies on internal dlls written (by yours truly) in C++, based upon Eigen and boost. Eigen is used extensively in science, engineering, robotics, and CG. And in x64-mode, data set size is limited only by your virtual memory. Yet to engage with it, you only need a few lines of AutoIt.1 point -
Calculation Mistakes in Large Arrays
rudi reacted to JockoDundee for a topic
I think it only fair to count the lines inserted by any new #include statement, recursively of course1 point -
Calculation Mistakes in Large Arrays
636C65616E reacted to JockoDundee for a topic
That is fast typing, if nothing else… 3000 lines (few thousand) * 80 chars (avg chars per line) / 5 (avg chars in word) / 8 hours (avg working day) / 60 minutes (avg minutes in an hour) = 100 WPM Impressive!1 point -
Hi @Lion66 As you recommended, I posted a topic on the UDF. The post is available here I have made a GUI with all the available detectors. Have a look at matching_homography_Demo.au3 I didn't look at the python file. If it doesn't help, let me know in the new post.1 point
-

FF.au3 (V0.6.0.1b-10)
noellarkin reacted to Melba23 for a topic
noellarkin, I suggest starting a new one using a title close to the one you have already used in the thread to which you link. M231 point -
Here a good reference to read (i think) https://accessexperts.com/blog/2011/03/24/sql-server-connections-strings-for-microsoft-access/ I use this to connect to SQL server in local network Opt("MustDeclareVars", 1) Opt("TrayIconDebug", 1) OnAutoItExitRegister("OnAutoItExit") Global $cn, $rst, $cmd, $sSQL, $SubSQL ;Help: COM Error Handling ;_ErrADODB From spudw2k ;https://www.autoitscript.com/forum/topic/105875-adodb-example/ Global $errADODB = ObjEvent("AutoIt.Error","_ErrADODB") Global Const $iCursorType = 3 ;0 adOpenForwardOnly, 3 adOpenStatic Global Const $iLockType = 3 ;1 adLockReadOnly, 3 adLockOptimistic Global Const $iOptions = 1 ; Options, 1 Evaluates as a textual definition of a command or stored procedure call ; 2 adCmdTable $cn = ObjCreate("ADODB.Connection") ; Create a connection object $rst = ObjCreate("ADODB.Recordset") ; Create a recordset object Global $sADOConnectionString = "Provider=SQLOLEDB;Data Source=99.9.9.99;Initial Catalog=MyDatabaseName;User Id=sa;Password=MyPassword;" ;https://www.w3schools.com/asp/prop_rs_cursorlocation.asp ;A Recordset object inherits this setting from the associated Connection object. ;This property is read-only on an open Recordset object, and read/write on a Connection object or on a closed Recordset object. $cn.CursorLocation = 2 ;2 adUseServer, 3 adUseClient $cn.CommandTimeout = 30 ;https://stackoverflow.com/questions/31941487/open-adodb-connection-to-excel-file-in-read-only-mode ;try Mode = adModeRead instead ;By the way, do not put adModeRead in the connections string, but just before openning your connection, add this line: rsConn.Mode = adModeRead ;I tried your suggestion, however since in VBA we do not have direct access to the ADODB built-in constants, I set rsCon.Mode = 1 ;as defined in the file adovbs.inc located in the folder "C:\Program Files\Common Files\System\ado" ;and although I watched the rsCon.Mode value being set to adModeRead while debugging, I still have the same problem and the application tries to access the file in Write/Edit mode. ;https://www.w3schools.com/asp/prop_rec_mode.asp ;$cn.Mode = 1 ;Read-only $cn.Open($sADOConnectionString) ; Open the connection ;MsgBox(0,"",$cn.ConnectionString) ;... $cn.Close ;Close the connection $cn = 0 ;Release the connection object Func _ErrADODB() Msgbox(0,"ADODB COM Error","We intercepted a COM Error !" & @CRLF & @CRLF & _ "err.description is: " & @TAB & $errADODB.description & @CRLF & _ "err.windescription:" & @TAB & $errADODB.windescription & @CRLF & _ "err.number is: " & @TAB & hex($errADODB.number,8) & @CRLF & _ "err.lastdllerror is: " & @TAB & $errADODB.lastdllerror & @CRLF & _ "err.scriptline is: " & @TAB & $errADODB.scriptline & @CRLF & _ "err.source is: " & @TAB & $errADODB.source & @CRLF & _ "err.helpfile is: " & @TAB & $errADODB.helpfile & @CRLF & _ "err.helpcontext is: " & @TAB & $errADODB.helpcontext, 5) Local $err = $errADODB.number If $err = 0 Then $err = -1 ;$rst = 0 ;$cmd = 0 $cn.Close $cn = 0 Exit EndFunc Func OnAutoItExit() ;$rst = 0 ; Release the recordset object $cmd = 0 If IsObj($cn) Then If $cn.State > 0 Then $cn.Close ;adStateOpen Close the connection $cn = 0 ; Release the connection object EndIf EndFunc1 point
-
1 point


