Leaderboard
Popular Content
Showing content with the highest reputation on 02/13/2021 in all areas
-
@Celtic88 Did you even try @TheXman Example? 🙄 Saludos2 points
-
@Celtic88 As the error message said, you were trying to send a plain HTTP request over an HTTPS port. So you have two choices to correct the error, you can change the script to send an HTTP request over port 80 or a secure request over port 443. Examples of the 2 options are below: HTTP Request Global $hOpen = _WinHttpOpen() Global $hConnect = _WinHttpConnect($hOpen, "http://api.coinpaprika.com/") Global $hRequest = _WinHttpOpenRequest($hConnect, "GET", "v1/coins/btc-bitcoin") Global $sReturned = '' _WinHttpSendRequest($hRequest) _WinHttpReceiveResponse($hRequest) If _WinHttpQueryDataAvailable($hRequest) Then Do $sReturned &= _WinHttpReadData($hRequest) Until @error EndIf MsgBox(0, 0, $sReturned) OR HTTPS Request Global $hOpen = _WinHttpOpen() Global $hConnect = _WinHttpConnect($hOpen, "https://api.coinpaprika.com/") Global $hRequest = _WinHttpOpenRequest($hConnect, _ "GET", _ "v1/coins/btc-bitcoin", _ "HTTP/1.1", _ $WINHTTP_NO_REFERER, _ "application/json", _ $WINHTTP_FLAG_SECURE _ ) Global $sReturned = '' _WinHttpSendRequest($hRequest) _WinHttpReceiveResponse($hRequest) If _WinHttpQueryDataAvailable($hRequest) Then Do $sReturned &= _WinHttpReadData($hRequest) Until @error EndIf MsgBox(0, 0, $sReturned) For the HTTPS request, note that the _WinHttpOpenRequest function requires the $WINHTTP_FLAG_SECURE parameter for it to send the request using the "secure" HTTPS protocol.2 points
-
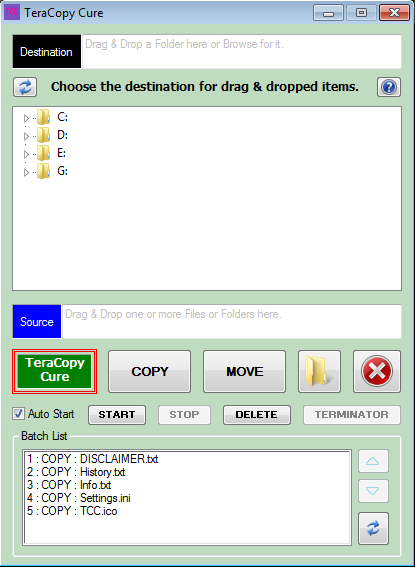
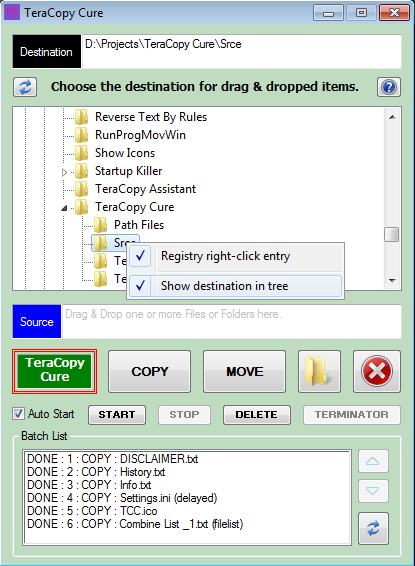
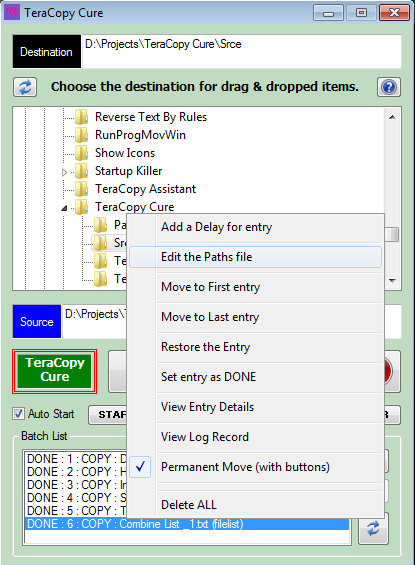
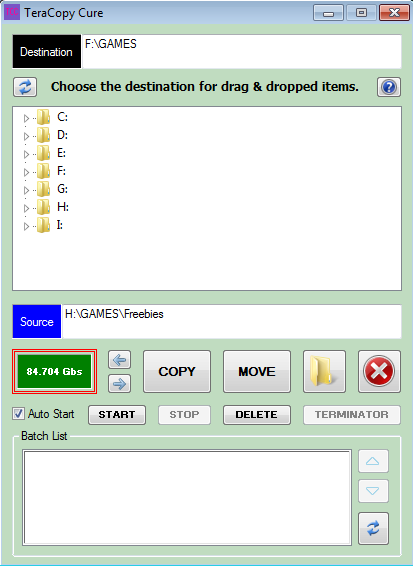
I like and have been using TeraCopy, a third party program, for many years. Mostly it is a great program, but it does have some issues. On Windows XP for instance, Thumbs.db files could often hold up a copy or move process until the user manually responded to the error prompt. Some other issues I discuss below. PLEASE NOTE - I am not related to or affiliated in any way with the 3rd party TeraCopy program developers. ALSO NOTE - I myself have only tested TeraCopy Cure at this point, on Windows 7 (32 bit), and only with the free version of TeraCopy 2.27. This program, TeraCopy Cure, is related to another one of my TeraCopy assistant programs, TeraCopy Timer, but aims at being simpler and quicker to use ... if lacking its more advanced features. TeraCopy Cure is a frontend for TeraCopy and sets out to make up for its flaws and limitations. One of those flaws is queuing order, and the limitation relates to a same destination issue. You would think that queue order would be the same as add order, but that is not the case, and if you are doing a mix of COPY and MOVE then the COPY process could easily fail. It could fail with some source items, even if the COPY process has already started before the same source MOVE process begins ... especially if the destination folder is on the source drive ... only the currently copying file is locked to that process. If you drag and drop another source for a same destination as an existing or impending COPY or MOVE process, then usually TeraCopy nicely adds it for you to that existing job. However, you might wish to avoid that, or it might occur during the testing phase of that active process, and then not be properly processed etc. But you are not given a choice and it just gets added. HOW TO USE See the right-click menu of the 'Batch List' (lowest field) and the right-click menu of the Tree field, for some useful options. (1) If desired, enable 'Auto Start'. NOTE - Even if enabled, this can be bypassed. (2) Set the destination folder, either by browsing on the tree or by dragging a folder to the Destination input field or label. Right-clicking on a folder in Explorer will also work, if enabled. The destination folder path will also show in the Tree if that right-click option is enabled. (3) Then drag & drop source file or folder onto one of three five areas - Folder (Drive) Tree field, or COPY or MOVE buttons ... this now also includes the source input and label. NOTE - If the Folder (Drive) Tree field is used, then you will additionally need to click either the COPY or MOVE button, to have that job added to the Batch List ... but this avoids 'Auto Start' if it is enabled. Drag & dropping to the buttons instead, saves on clicking, but starts the first job etc immediately if 'Auto Start' is enabled. (4) If needed and ready, click the START button to run the first job and those that follow. More information is included in program and in the NOTES etc sections below. WARNING - Depending on the amount of content on your destination drive, and folder level depth, and the speed of your PC, display of the full path in the Folder (Drive) Tree can take a while to show ... if you have that (right-click) option enabled ... it isn't by default. I found this feature quite tricky to get right, and I'm still not 100% sure it is now full-proof. (source is included) TeraCopy Cure v1.6.zip (source is included) NOTES UPDATES INFORMATION OLDER DOWNLOADS1 point
-
Did I try what? Did I try to answer your question as to why your script wasn't working? The answer is yes. Did I show you 2 snippets of code, with context, to further illustrate what I had written in my explanation of your issue? The answer is yes. Did I run my examples to make sure that they worked before posting them? The answer is yes, of course I did. The examples show the relevant parts of you original script, with context, that should be replaced. They are not and were not supposed to be a fully running script. They were snippets of code for you to compare & contrast to your original script in order for you to learn from. I have no idea what you are asking but hopefully I have answered your question.1 point
-
Summary of the Getting started examplesThe 7z-file at bottom of this post has been updated again. All examples have been updated to make the code a little more uniform. The Getting started version of the Scripting example has been added as WebView2-5.au3. The Communication example has been added as WebView2-6.au3. The example still doesn't work because CoreWebView2WebMessageReceivedEventHandler_Invoke() isn't called. But the example no longer crashes. The crash was caused by the CoreWebView2WebMessageReceivedEventHandlerDelete() function in the cleanup section immediately after the main loop. This code line has been deleted.1 point
-

WinMerge / Github / StackOverFlow / Track - AutoIt Syntax Highlighting
FrancescoDiMuro reacted to mLipok for a topic
1 point -
If you like this program but wish it were a bit simpler and don't need some of the more advanced things, then my new program TeraCopy Cure may be just the program for you. It also features delayed starts, and additionally has a browse tree, plus you can add more jobs while existing jobs are running, plus quickly and simply add to an existing job, plus a right-click Explorer support option, etc.1 point
-
New Multi-Monitor UDF and Applications (moved)
argumentum reacted to Mbee for a topic
Thanks a huge bunch-o-beers, @argumentum ! Perhaps I should have been more effusive in what I wrote in the "Thanks" portion of the UDF header I posted above, because I really *do* feel so utterly positive and grateful to you and all my teachers here. I also should have added that this community is universally replete with some of the friendliest and most welcoming people I have ever encountered in my real-life and virtual travels. Thank you once more for your kind and gracious words, pal argumentum!1 point -
1 point
-
Now the JavaScript code works. But the Communication example still doesn't work. The Invoke method of the CoreWebView2WebMessageReceivedEventHandler callback interface isn't called and a COM error is generated when the script exits. For the time being, let's leave this problem alone. The Getting started examples except the Communication example can be found in the 7z-file at bottom of this post. Now we've more or less been through all the Getting started examples. How do we get on from here?1 point
-

New Multi-Monitor UDF and Applications (moved)
Mbee reacted to argumentum for a topic
look, you can replace: $Lf_WinState = WinGetState( $Lf_WinHdl ) $Lf_Minimized = BitAND( $Lf_WinState, $WIN_STATE_MINIMIZED ) $Lf_Minimized = ($Lf_Minimized <> 0) ? True : False If $Lf_Minimized Then Return 0 EndIf with: If BitAND(WinGetState($Lf_WinHdl), $WIN_STATE_MINIMIZED) = $WIN_STATE_MINIMIZED Then Return 0 so, am I smarter than you ? Look, experience takes time. Don't beat yourself up. None of us is like, "OMG you're the best there is ever being". You are sharing a project and it's always welcomed. And welcomed should be corrections. I'm a better coder thanks to that. Tho, I do disregard emotional content, as it, is open to interpretation and sense of humor or lack of it, from either me or the one correcting me. In any case, correct all that needs correcting and, thanks for sharing1 point -
OK Got it. I found some code to guide mere here: https://www.autoitscript.com/forum/topic/197080-using-ui-automation-code-in-autoit/page/3/ I basically replaced the for loop with the following: Local $pElement1, $oElement1, $sValue1 For $i = 0 To $iElements - 1 $oUIElementArray.GetElement( $i, $pElement1 ) $oElement1 = ObjCreateInterface( $pElement1, $sIID_IUIAutomationElement, $dtagIUIAutomationElement ) $oElement1.GetCurrentPropertyValue( $UIA_NamePropertyId, $sValue1 ) ConsoleWrite( "$sValue1 = " & $sValue1 & @CRLF ) Next Now the full code to enumerate through open Chrome Tabs is as so: #include "CUIAutomation2.au3" ; Window handle Local $hWindow = WinGetHandle( "[CLASS:Chrome_WidgetWin_1]" ) If Not IsHWnd( $hWindow ) Then Return ConsoleWrite( "$hWindow ERR" & @CRLF ) ConsoleWrite( "$hWindow OK" & @CRLF ) ; Activate window WinActivate( $hWindow ) Sleep( 100 ) ; UI Automation object Local $oUIAutomation = ObjCreateInterface( $sCLSID_CUIAutomation, $sIID_IUIAutomation, $dtagIUIAutomation ) If Not IsObj( $oUIAutomation ) Then Return ConsoleWrite( "$oUIAutomation ERR" & @CRLF ) ConsoleWrite( "$oUIAutomation OK" & @CRLF ) ; Desktop element Local $pDesktop, $oDesktop $oUIAutomation.GetRootElement( $pDesktop ) $oDesktop = ObjCreateInterface( $pDesktop, $sIID_IUIAutomationElement, $dtagIUIAutomationElement ) If Not IsObj( $oDesktop ) Then Return ConsoleWrite( "$oDesktop ERR" & @CRLF ) ConsoleWrite( "$oDesktop OK" & @CRLF ) ; Chrome window Local $pCondition $oUIAutomation.CreatePropertyCondition( $UIA_ClassNamePropertyId, "Chrome_WidgetWin_1", $pCondition ) If Not $pCondition Then Return ConsoleWrite( "$pCondition ERR" & @CRLF ) ConsoleWrite( "$pCondition OK" & @CRLF ) Local $pChrome, $oChrome $oDesktop.FindFirst( $TreeScope_Descendants, $pCondition, $pChrome ) $oChrome = ObjCreateInterface( $pChrome, $sIID_IUIAutomationElement, $dtagIUIAutomationElement ) If Not IsObj( $oChrome ) Then Return ConsoleWrite( "$oChrome ERR" & @CRLF ) ConsoleWrite( "$oChrome OK" & @CRLF ) ; Tab item Local $pCondition1 $oUIAutomation.CreatePropertyCondition( $UIA_ControlTypePropertyId, $UIA_TabItemControlTypeId, $pCondition1 ) If Not $pCondition1 Then Return ConsoleWrite( "$pCondition1 ERR" & @CRLF ) ConsoleWrite( "$pCondition1 OK" & @CRLF ) ;~ ; Find All tab items Local $pTabs, $oUIElementArray, $iElements, $pFound, $oFound, $value $oChrome.FindAll( $TreeScope_Descendants, $pCondition1, $pTabs ) $oUIElementArray = ObjCreateInterface( $pTabs, $sIID_IUIAutomationElementArray, $dtagIUIAutomationElementArray );Ends in array $oUIElementArray.Length( $iElements ) ConsoleWrite( "$iElements:" & $iElements & @CRLF ) Local $pElement1, $oElement1, $sValue1 For $i = 0 To $iElements - 1 $oUIElementArray.GetElement( $i, $pElement1 ) $oElement1 = ObjCreateInterface( $pElement1, $sIID_IUIAutomationElement, $dtagIUIAutomationElement ) $oElement1.GetCurrentPropertyValue( $UIA_NamePropertyId, $sValue1 ) ConsoleWrite( "$sValue1 = " & $sValue1 & @CRLF ) Next Hope someone can use this code. I won't need to install Chrome UDF or the webdriver with this code ;-)1 point
-
Hi folks! I bring this little executable file and an AutoIt wrapper for it to generate documents (bills and incomes) by sending variables (strings, numbers or even arrays) to a PHP script you wrote. This is the syntax: themecli.exe <input> <output> <vars> input: The input PHP file (the extension does not need to be .php, it can be anything, like .html, .txt, .bin, .wtf...), relative to @ScriptDiroutput: The output HTML file to save, relative to @ScriptDirvars: A base64-encoded JSON with all the variables (hard? Don't worry! See below:)Looks confusing? Well, don't worry. That's why we have a wrapper! Example, if we have this file "page.php": Hello, <?=$user?>! How are you?And do this with AutoIt (using my JSONgen UDF [ http://www.autoitscript.com/forum/index.php?showtopic=173797 ] which is already included in AutoPHP): #include 'inc\autophp.au3' $ojson = New_JSON() JSON_AddElement($ojson, 'user', 'John Doe') $json = JSON_GetJSON($ojson) AutoPHP('page.php', 'hello.txt', $json)Note that you don't need to base64-encode it. After running it, we will see a file named "hello.txt", and the content is: Hello, John Doe! How are you?On the PHP file you can also use loops and everything else supported in PHP4 (since it uses Bambalam PHP Compiler, it does not support PHP5 yet). On the zip file there is an example of how to use it with loops. License: same Bambalam PHP Compiler license: Tip: If you use wkhtmltox, you'll be able to convert the generated HTML file into PDF with just a few lines! See here: https://www.autoitscript.com/forum/topic/173611-wkhtmltox-autoit-objectclass-to-convert-html-filespages-into-pdf-and-images/ Download: AutoPHP.zip full script, dependencies and examples (everything you need to start using AutoPHP) phpthemecli-src.zip Themecli binary and source (Themecli is the tool that AutoPHP uses to run PHP code - since it's already included on AutoPHP UDF, you don't need to download it, unless you want to use it with another programming language)1 point


