Leaderboard
Popular Content
Showing content with the highest reputation on 08/28/2019 in all areas
-
Version 1.6.1.0
3,057 downloads
Extensive library to control and manipulate Microsoft Task Scheduler Service. Please check this site for the implementation status! Please check the History.txt file in the archive for the changelog. Please check the WIKI for details about how to use the UDF. BTW: If you like this UDF please click the "I like this" button. This tells me where to next put my development effort KNOWN BUGS (last changed: 2021-02-03) None Things to come (last changed: 2021-02-03) None2 points -
Also be aware that the Map datatype is deprecated.2 points
-
@rlvitorino Starting from ChromeDriver version 76, disable-infobars flag was officially deprecated. I solved the problem by changing the capabilities as follows: $sDesiredCapabilities = '{"capabilities": {"alwaysMatch": {"unhandledPromptBehavior": "ignore", "goog:chromeOptions": {"w3c": true, "excludeSwitches": ["enable-automation"], "useAutomationExtension": false, "args": ["start-maximized"] }}}}' Reference : https://stackoverflow.com/questions/57298901/unable-to-hide-chrome-is-being-controlled-by-automated-software-infobar-within2 points
-
Introduction JSON (Javascript Object Notation) is a popular data-interchange format and supported by a lot of script languages. On AutoIt, there is already a >JSON UDF written by Gabriel Boehme. It is good but too slow, and not supports unicode and control characters very well. So I write a new one (and of course, fast one as usual). I use a machine code version of JSON parser called "jsmn". jsmn not only supports standard JSON, but also accepts some non-strict JSON string. See below for example. Important Update!! I rename the library from jsmn.au3 to json.au3. All function names are changed, too. Decoding Function Json_Decode($Json) $Json can be a standard or non-standard JSON string. For example, it accepts: { server: example.com port: 80 message: "this looks like a config file" } The most JSON data type will be decoded into corresponding AutoIt variable, including 1D array, string, number, true, false, and null. JSON object will be decoded into "Windows Scripting Dictionary Object" retuned from ObjCreate("Scripting.Dictionary"). AutoIt build-in functions like IsArray, IsBool, etc. can be used to check the returned data type. But for Object and Null, Json_IsObject() and Json_IsNull() should be used. If the input JSON string is invalid, @Error will be set to $JSMN_ERROR_INVAL. And if the input JSON string is not finish (maybe read from stream?), @Error will be set to $JSMN_ERROR_PART. Encoding Function Json_Encode($Data, $Option = 0, $Indent = "\t", $ArraySep = ",\r\n", $ObjectSep = ",\r\n", $ColonSep = ": ") $Data can be a string, number, bool, keyword(default or null), 1D arrry, or "Scripting.Dictionary" COM object. Ptr will be converted to number, Binary will be converted to string in UTF8 encoding. Other unsupported types like 2D array, dllstruct or object will be encoded into null. $Option is bitmask consisting following constant: $JSON_UNESCAPED_ASCII ; Don't escape ascii charcters between chr(1) ~ chr(0x1f) $JSON_UNESCAPED_UNICODE ; Encode multibyte Unicode characters literally $JSON_UNESCAPED_SLASHES ; Don't escape / $JSON_HEX_TAG ; All < and > are converted to \u003C and \u003E $JSON_HEX_AMP ; All &amp;amp;amp;s are converted to \u0026 $JSON_HEX_APOS ; All ' are converted to \u0027 $JSON_HEX_QUOT ; All " are converted to \u0022 $JSON_PRETTY_PRINT ; Use whitespace in returned data to format it $JSON_STRICT_PRINT ; Make sure returned JSON string is RFC4627 compliant $JSON_UNQUOTED_STRING ; Output unquoted string if possible (conflicting with $JSMN_STRICT_PRINT) Most encoding option have the same means like PHP's json_enocde() function. When $JSON_PRETTY_PRINT is set, output format can be change by other 4 parameters ($Indent, $ArraySep, $ObjectSep, and $ColonSep). Because these 4 output format parameters will be checked inside Jsmn_Encode() function, returned string will be always accepted by Jsmn_Decode(). $JSON_UNQUOTED_STRING can be used to output unquoted string that also accetped by Jsmn_Decode(). $JSON_STRICT_PRINT is used to check output format setting and avoid non-standard JSON output. So this option is conflicting with $JSON_UNQUOTED_STRING. Get and Put Functions Json_Put(ByRef $Var, $Notation, $Data, $CheckExists = False) Json_Get(ByRef $Var, $Notation) These functions helps user to access object or array more easily. Both dot notation and square bracket notation can be supported. Json_Put() by default will create non-exists objects and arrays. For example: Local $Obj Json_Put($Obj, ".foo", "foo") Json_Put($Obj, ".bar[0]", "bar") Json_Put($Obj, ".test[1].foo.bar[2].foo.bar", "Test") Local $Test = Json_Get($Obj, '["test"][1]["foo"]["bar"][2]["foo"]["bar"]') ; "Test" Object Help Functions Json_ObjCreate() Json_ObjPut(ByRef $Object, $Key, $Value) Json_ObjGet(ByRef $Object, $Key) Json_ObjDelete(ByRef $Object, $Key) Json_ObjExists(ByRef $Object, $Key) Json_ObjGetCount(ByRef $Object) Json_ObjGetKeys(ByRef $Object) Json_ObjClear(ByRef $Object) These functions are just warps of "Scripting.Dictionary" COM object. You can use these functions if you are not already familiar with it. == Update 2013/05/19 == * Add Jsmn_Encode() option "$JSMN_UNESCAPED_ASCII". Now the default output of Json_Encode() is exactly the same as PHP's json_encode() function (for example, chr(1) will be encoded into u0001). $JSON_UNESCAPED_ASCII ; Don't escape ascii charcters between chr(1) ~ chr(0x1f) == Update 2015/01/08 == * Rename the library from jsmn.au3 to json.au3. All function names are changed, too. * Add Json_Put() and Json_Get() * Add Null support * Using BinaryCall.au3 to loading the machine code. == Update 2018/01/13== (Jos) * Add JsonDump() to list all Json Keys and their values to easily figure out what they are. == Update 2018/10/01== (Jos) * Fixed JsonDump() some fields and values were not showing as discussed here - tnx @TheXman . == Update 2018/10/01b== (Jos) * Added Json_ObjGetItems, Tidied source and fixed au3check warnings - tnx @TheXman . == Update 2018/10/28== (Jos) * Added declaration for $value to avoid au3check warning - tnx @DerPensionist == Update 2018/12/16== (Jos) * Added another declaration for $value to avoid au3check warning and updated the version at the top - tnx @maniootek == Update 2018/12/29== (Jos) * Changed Json_ObjGet() and Json_ObjExists() to allow for multilevel object in string. == Update 2019/01/17== (Jos) * Added support for DOT notation in JSON functions. == Update 2019/07/15== (Jos) * Added support for reading keys with a dot inside when using a dot as separator (updated) == Update 2021/11/18== (TheXman) * Update details in below post: == Update 2021/11/20== (TheXman) * Minor RegEx update, no change to the functionality or result._Json(2021.11.20).zip1 point
-
Here is the latest assembly engine from Tomasz Grysztar, flat assembler g as a dll which I compiled using original fasm engine. He doesn't have it compiled in the download package but it was as easy as compiling a exe in autoit if you ever have to do it yourself. Just open up the file in the fasm editor and press F5. You can read about what makes fasmg different from the original fasm HERE if you want . The minimum you should understand is that this engine is bare bones by itself not capable of very much. The macro engine is the major difference and it uses macros for basically everything now including implementing the x86 instructions and formats. All of these macros are located within the include folder and you should keep that in its original form. When I first got the dll compiled I couldn't get it to generate code in flat binary format. It was working but size of output was over 300 bytes no matter what the assembly code and could just tell it was outputting a different format than binary. Eventually I figured out that within the primary "include\win32ax.inc"', it executes a macro "format PE GUI 4.0" if x86 has not been defined. I underlined macro there because at first I (wasted shit loads of time because I) didn't realize it was a macro (adding a bunch of other includes) since in version 1 the statement "format binary" was a default if not specified and specifically means add nothing extra to the code. So long story short, the part that I was missing is including the cpu type and extensions from include\cpu folder. By default I add x64 type and SSE4 ext includes. Note that the x64 here is not about what mode we are running in, this is for what instructions your cpu supports. if you are running on some really old hardware that may need to be adjusted or if your on to more advanced instructions like the avx extensions, you may have to add those includes to your source. Differences from previous dll function I like the error reporting much better in this one. With the last one we had a ton error codes and a variable return structure depending on what kind of error it had. I even had an example showing you what kind of an error would give you correct line numbers vs wouldn't. With this one the stdout is passed to the dll function and it simply prints the line/details it had a problem with to the console. The return value is the number of errors counted. It also handles its own memory needs automatically now . If the output region is not big enough it will virtualalloc a new one and virtualfree the previous. Differences in Code Earlier this year I showed some examples of how to use the macros to make writing assembly a little more familiar. Almost all the same functionality exists here but there are a couple syntax sugar items gone and slight change in other areas. Whats gone is FIX and PTR. Both syntax sugar that dont really matter. A couple changes to structures as well but these are for the better. One is unnamed elements are allowed now, but if it does not have a name, you are not allowed to initialize those elements during creation because they can only be intialized via syntax name:value . Previously when you initialized the elements, you would do by specifying values in a comma seperated list using the specific order like value1,value2,etc, but this had a problem because it expected commas even when the elements were just padding for alignment so this works out better having to specify the name and no need for _FasmFixInit function. "<" and ">" are not longer used in the initializes ether. OLD: $sTag = 'byte x;short y;char sNote[13];long odd[5];word w;dword p;char ext[3];word finish' _(_FasmAu3StructDef('AU3TEST', $sTag));convert and add definition to source _(' tTest AU3TEST ' & _FasmFixInit('1,222,<"AutoItFASM",0>,<41,43,43,44,45>,6,7,"au3",12345', $sTag));create and initalize New: $sTag = 'byte x;short y;char sNote[13];long odd[5];word w;dword p;char ext[3];word finish' _(_fasmg_Au3StructDef('AU3TEST', $sTag)) ;convert and add definition to source _(' tTest AU3TEST x:11,y:22,sNote:"AutoItFASM",odd:41,odd+4:42,odd+8:43,w:6,p:7,ext:"au3",finish:12345');create and initalize Extra Includes I created a includeEx folder for the extra macros I wrote/found on the forums. Most of them are written by Thomaz so they may eventually end up in the standard library. Edit: Theres only the one include folder now. All the default includes are in thier own folder within that folder and all the custom ones are top level. Align.inc, Nop.inc, Listing.inc The Align and Nop macros work together to align the next statement to whatever boundary you specified and it uses multibyte nop codes to fill in the space. Filling the space with nop is the default but you can also specify a fill value if you want. Align.assume is another macro part of align.inc that can be used to set tell the engine that a certain starting point is assumed to be at a certain boundary alignment and it will do its align calculations based on that value. Listing is a macro great for seeing where and what opcodes are getting generated from each line of assembly code. Below is an example of the source and output you would see printed to the console during the assembly. I picked this slightly longer example because it best shows use of align, nop, and then the use of listing to verify the align/nop code. Nop codes are instructions that do nothing and one use of them is to insert nop's as space fillers when you want a certian portion of your code to land on a specific boundary offset. I dont know all the best practices here with that (if you do please post!) but its a type of optimization for the cpu. Because of its nature of doing nothing, I cant just run the code and confirm its correct because it didnt crash. I need to look at what opcodes the actual align statements made and listing made that easy. source example: _('procf _main stdcall, pAdd') _(' mov eax, [pAdd]') _(' mov dword[eax], _crc32') _(' mov dword[eax+4], _strlen') _(' mov dword[eax+8], _strcmp') _(' mov dword[eax+12], _strstr') _(' ret') _('endp') _('EQUAL_ORDERED = 1100b') _('EQUAL_ANY = 0000b') _('EQUAL_EACH = 1000b') _('RANGES = 0100b') _('NEGATIVE_POLARITY = 010000b') _('BYTE_MASK = 1000000b') _('align 8') _('proc _crc32 uses ebx ecx esi, pStr') _(' mov esi, [pStr]') _(' xor ebx, ebx') _(' not ebx') _(' stdcall _strlen, esi') _(' .while eax >= 4') _(' crc32 ebx, dword[esi]') _(' add esi, 4') _(' sub eax, 4') _(' .endw') _(' .while eax') _(' crc32 ebx, byte[esi]') _(' inc esi') _(' dec eax') _(' .endw') _(' not ebx') _(' mov eax, ebx') _(' ret') _('endp') _('align 8, 0xCC') ; fill with 0xCC instead of NOP _('proc _strlen uses ecx edx, pStr') _(' mov ecx, [pStr]') _(' mov edx, ecx') _(' mov eax, -16') _(' pxor xmm0, xmm0') _(' .repeat') _(' add eax, 16') _(' pcmpistri xmm0, dqword[edx + eax], 1000b') ;EQUAL_EACH') _(' .until ZERO?') ; repeat loop until Zero flag (ZF) is set _(' add eax, ecx') ; add remainder _(' ret') _('endp') _('align 8') _('proc _strcmp uses ebx ecx edx, pStr1, pStr2') ; ecx = string1, edx = string2' _(' mov ecx, [pStr1]') ; ecx = start address of str1 _(' mov edx, [pStr2]') ; edx = start address of str2 _(' mov eax, ecx') ; eax = start address of str1 _(' sub eax, edx') ; eax = ecx - edx | eax = start address of str1 - start address of str2 _(' sub edx, 16') _(' mov ebx, -16') _(' STRCMP_LOOP:') _(' add ebx, 16') _(' add edx, 16') _(' movdqu xmm0, dqword[edx]') _(' pcmpistri xmm0, dqword[edx + eax], EQUAL_EACH + NEGATIVE_POLARITY') ; EQUAL_EACH + NEGATIVE_POLARITY ; find the first *different* bytes, hence negative polarity' _(' ja STRCMP_LOOP') ;a CF or ZF = 0 above _(' jc STRCMP_DIFF') ;c cf=1 carry _(' xor eax, eax') ; the strings are equal _(' ret') _(' STRCMP_DIFF:') _(' mov eax, ebx') _(' add eax, ecx') _(' ret') _('endp') _('align 8') _('proc _strstr uses ecx edx edi esi, sStrToSearch, sStrToFind') _(' mov ecx, [sStrToSearch]') _(' mov edx, [sStrToFind]') _(' pxor xmm2, xmm2') _(' movdqu xmm2, dqword[edx]') ; load the first 16 bytes of neddle') _(' pxor xmm3, xmm3') _(' lea eax, [ecx - 16]') _(' STRSTR_MAIN_LOOP:') ; find the first possible match of 16-byte fragment in haystack') _(' add eax, 16') _(' pcmpistri xmm2, dqword[eax], EQUAL_ORDERED') _(' ja STRSTR_MAIN_LOOP') _(' jnc STRSTR_NOT_FOUND') _(' add eax, ecx ') ; save the possible match start') _(' mov edi, edx') _(' mov esi, eax') _(' sub edi, esi') _(' sub esi, 16') _(' @@:') ; compare the strings _(' add esi, 16') _(' movdqu xmm1, dqword[esi + edi]') _(' pcmpistrm xmm3, xmm1, EQUAL_EACH + NEGATIVE_POLARITY + BYTE_MASK') ; mask out invalid bytes in the haystack _(' movdqu xmm4, dqword[esi]') _(' pand xmm4, xmm0') _(' pcmpistri xmm1, xmm4, EQUAL_EACH + NEGATIVE_POLARITY') _(' ja @b') _(' jnc STRSTR_FOUND') _(' sub eax, 15') ;continue searching from the next byte _(' jmp STRSTR_MAIN_LOOP') _(' STRSTR_NOT_FOUND:') _(' xor eax, eax') _(' ret') _(' STRSTR_FOUND:') _(' sub eax, [sStrToSearch]') _(' inc eax') _(' ret') _('endp') Listing Output: 00000000: use32 00000000: 55 89 E5 procf _main stdcall, pAdd 00000003: 8B 45 08 mov eax, [pAdd] 00000006: C7 00 28 00 00 00 mov dword[eax], _crc32 0000000C: C7 40 04 68 00 00 00 mov dword[eax+4], _strlen 00000013: C7 40 08 90 00 00 00 mov dword[eax+8], _strcmp 0000001A: C7 40 0C D8 00 00 00 mov dword[eax+12], _strstr 00000021: C9 C2 04 00 ret 00000025: localbytes = current 00000025: purge ret?,locals?,endl?,proclocal? 00000025: end namespace 00000025: purge endp? 00000025: EQUAL_ORDERED = 1100b 00000025: EQUAL_ANY = 0000b 00000025: EQUAL_EACH = 1000b 00000025: RANGES = 0100b 00000025: NEGATIVE_POLARITY = 010000b 00000025: BYTE_MASK = 1000000b 00000025: 0F 1F 00 align 8 00000028: 55 89 E5 53 51 56 proc _crc32 uses ebx ecx esi, pStr 0000002E: 8B 75 08 mov esi, [pStr] 00000031: 31 DB xor ebx, ebx 00000033: F7 D3 not ebx 00000035: 56 E8 2D 00 00 00 stdcall _strlen, esi 0000003B: 83 F8 04 72 0D .while eax >= 4 00000040: F2 0F 38 F1 1E crc32 ebx, dword[esi] 00000045: 83 C6 04 add esi, 4 00000048: 83 E8 04 sub eax, 4 0000004B: EB EE .endw 0000004D: 85 C0 74 09 .while eax 00000051: F2 0F 38 F0 1E crc32 ebx, byte[esi] 00000056: 46 inc esi 00000057: 48 dec eax 00000058: EB F3 .endw 0000005A: F7 D3 not ebx 0000005C: 89 D8 mov eax, ebx 0000005E: 5E 59 5B C9 C2 04 00 ret 00000065: localbytes = current 00000065: purge ret?,locals?,endl?,proclocal? 00000065: end namespace 00000065: purge endp? 00000065: CC CC CC align 8, 0xCC 00000068: 55 89 E5 51 52 proc _strlen uses ecx edx, pStr 0000006D: 8B 4D 08 mov ecx, [pStr] 00000070: 89 CA mov edx, ecx 00000072: B8 F0 FF FF FF mov eax, -16 00000077: 66 0F EF C0 pxor xmm0, xmm0 0000007B: .repeat 0000007B: 83 C0 10 add eax, 16 0000007E: 66 0F 3A 63 04 02 08 pcmpistri xmm0, dqword[edx + eax], 1000b 00000085: 75 F4 .until ZERO? 00000087: 01 C8 add eax, ecx 00000089: 5A 59 C9 C2 04 00 ret 0000008F: localbytes = current 0000008F: purge ret?,locals?,endl?,proclocal? 0000008F: end namespace 0000008F: purge endp? 0000008F: 90 align 8 00000090: 55 89 E5 53 51 52 proc _strcmp uses ebx ecx edx, pStr1, pStr2 00000096: 8B 4D 08 mov ecx, [pStr1] 00000099: 8B 55 0C mov edx, [pStr2] 0000009C: 89 C8 mov eax, ecx 0000009E: 29 D0 sub eax, edx 000000A0: 83 EA 10 sub edx, 16 000000A3: BB F0 FF FF FF mov ebx, -16 000000A8: STRCMP_LOOP: 000000A8: 83 C3 10 add ebx, 16 000000AB: 83 C2 10 add edx, 16 000000AE: F3 0F 6F 02 movdqu xmm0, dqword[edx] 000000B2: 66 0F 3A 63 04 02 18 pcmpistri xmm0, dqword[edx + eax], EQUAL_EACH + NEGATIVE_POLARITY 000000B9: 77 ED ja STRCMP_LOOP 000000BB: 72 09 jc STRCMP_DIFF 000000BD: 31 C0 xor eax, eax 000000BF: 5A 59 5B C9 C2 08 00 ret 000000C6: STRCMP_DIFF: 000000C6: 89 D8 mov eax, ebx 000000C8: 01 C8 add eax, ecx 000000CA: 5A 59 5B C9 C2 08 00 ret 000000D1: localbytes = current 000000D1: purge ret?,locals?,endl?,proclocal? 000000D1: end namespace 000000D1: purge endp? 000000D1: 0F 1F 80 00 00 00 00 align 8 000000D8: 55 89 E5 51 52 57 56 proc _strstr uses ecx edx edi esi, sStrToSearch, sStrToFind 000000DF: 8B 4D 08 mov ecx, [sStrToSearch] 000000E2: 8B 55 0C mov edx, [sStrToFind] 000000E5: 66 0F EF D2 pxor xmm2, xmm2 000000E9: F3 0F 6F 12 movdqu xmm2, dqword[edx] 000000ED: 66 0F EF DB pxor xmm3, xmm3 000000F1: 8D 41 F0 lea eax, [ecx - 16] 000000F4: STRSTR_MAIN_LOOP: 000000F4: 83 C0 10 add eax, 16 000000F7: 66 0F 3A 63 10 0C pcmpistri xmm2, dqword[eax], EQUAL_ORDERED 000000FD: 77 F5 ja STRSTR_MAIN_LOOP 000000FF: 73 30 jnc STRSTR_NOT_FOUND 00000101: 01 C8 add eax, ecx 00000103: 89 D7 mov edi, edx 00000105: 89 C6 mov esi, eax 00000107: 29 F7 sub edi, esi 00000109: 83 EE 10 sub esi, 16 0000010C: @@: 0000010C: 83 C6 10 add esi, 16 0000010F: F3 0F 6F 0C 3E movdqu xmm1, dqword[esi + edi] 00000114: 66 0F 3A 62 D9 58 pcmpistrm xmm3, xmm1, EQUAL_EACH + NEGATIVE_POLARITY + BYTE_MASK 0000011A: F3 0F 6F 26 movdqu xmm4, dqword[esi] 0000011E: 66 0F DB E0 pand xmm4, xmm0 00000122: 66 0F 3A 63 CC 18 pcmpistri xmm1, xmm4, EQUAL_EACH + NEGATIVE_POLARITY 00000128: 77 E2 ja @b 0000012A: 73 0F jnc STRSTR_FOUND 0000012C: 83 E8 0F sub eax, 15 0000012F: EB C3 jmp STRSTR_MAIN_LOOP 00000131: STRSTR_NOT_FOUND: 00000131: 31 C0 xor eax, eax 00000133: 5E 5F 5A 59 C9 C2 08 00 ret 0000013B: STRSTR_FOUND: 0000013B: 2B 45 08 sub eax, [sStrToSearch] 0000013E: 40 inc eax 0000013F: 5E 5F 5A 59 C9 C2 08 00 ret 00000147: localbytes = current 00000147: purge ret?,locals?,endl?,proclocal? 00000147: end namespace 00000147: purge endp? procf and forcea macros In my previous post I spoke about the force macro and why the need for it. I added two more macros (procf and forcea) that combine the two and also sets align.assume to the same function. As clarified in the previous post, you should only have to use these macros for the first procedure being defined (since nothing calls that procedure). And since its the first function, it should be the starting memory address which is a good place to initially set the align.assume address to. Attached package should include everything needed and has all the previous examples I posted updated. Let me know if I missed something or you have any issues running the examples and thanks for looking Update 04/19/2020: A couple new macros added. I also got rid of the IncludeEx folder and just made one include folder that has the default include folder within it and all others top level. dllstruct macro does the same thing as _fasmg_Au3StructDef(). You can use either one; they both use the macro. getmempos macro does the delta trick I showed below using anonymous labels. stdcallw and invokew macros will push any parameters that are raw (quoted) strings as wide characters Ifex include file gives .if .ifelse .while .until the ability to use stdcall/invoke/etc inline. So if you had a function called "_add" you could do .if stdcall(_add,5,5) = 10. All this basically does in the background is perform the stdcall and then replaces the comparison with eax and passes it on to the original default macros, but is super helpful for cleaning up code and took a ton of time learning the macro language to get in place. Update 05/19/2020: Added fastcallw that does same as stdcallw only Added fastcall support for Ifex Corrected missing include file include\macro\if.inc within win64au3.inc fasmg 5-19-2020.zip Previous versions:1 point
-
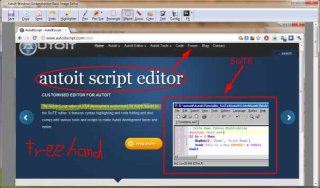
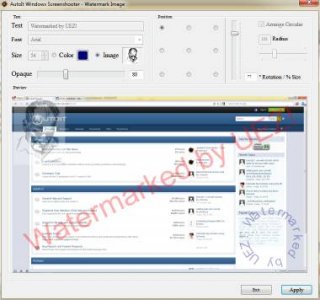
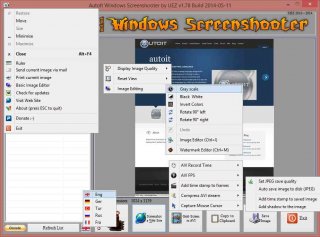
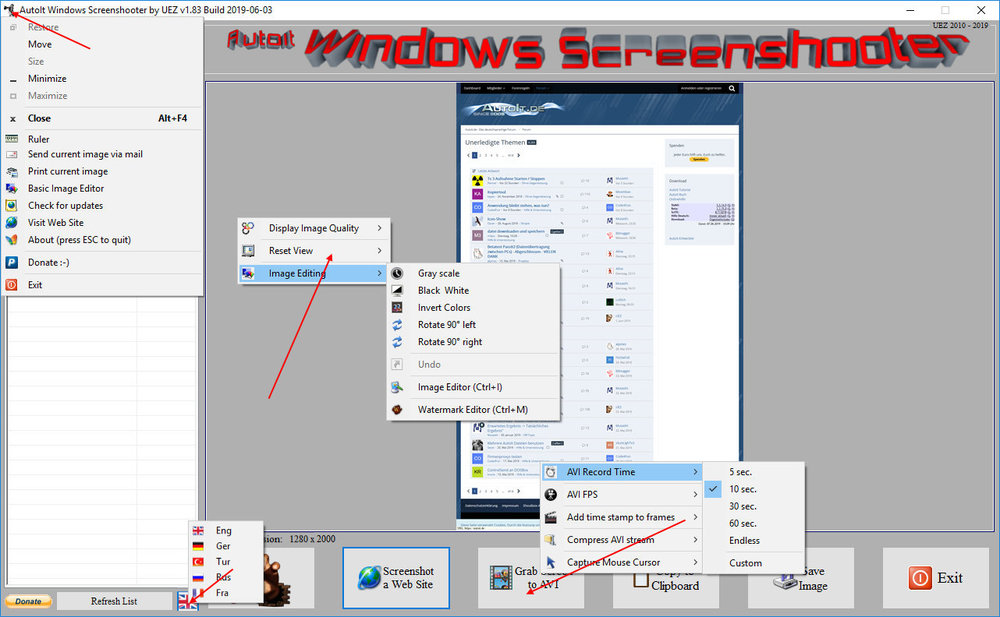
AutoIt Windows Screenshooter Key Features: takes easily a screenshot from any visible window capture any region of the desktop incl. freehand capturing capture GUI controls and GUI menus separately capture a marked area every x seconds for a duration of y seconds create a GIF animation from saved frames (Vista or higher os required) capture to AVI file (without audio!) takes a screenshot from web sites (available only on Win7+ os and when Aero is enabled) put images to clipboard to paste to other applications easily color picker save image in different formats and also to PDF! add timestamp to saved images simple image editing options: greyscale, b&w, invert, rotate +-90° send image to printer and default email client preview of captured screens incl. zoom option multi monitor support display pixel color under mouse ruler basic image editor (paint, highlight, ellipse, rectangle, text and some graphic FX) watermark captured image no 3rd party tools or DLLs used - pure AutoIt! fully portable - no installation is needed multi language feature (Eng, Ger, Tur, Fra and Rus only) drag'n'drop an image to the app for editing To do: capture content of scrollable window/control capture cascaded menus Due to DllCall("User32.dll", "int", "PrintWindow", "hwnd", $hWnd, "handle", $hMemDC, "int", 0) limitation some windows cannot be captured properly (GDI+, ProgDVB, etc.) but can take screenshots of hidden windows. One workaround is to use full screen capturing (F11/F12) or "Grab Screen" function! Or try double click with rmb on listview items (beta). Download source code (10489 downloads previously): AutoIt Windows Screenshooter v1.84 Build 2019-08-18.7z (version 3.3.12.0+ needed!) You are not allowed to sell this code or just parts of it in a commercial project or modify it and distribute it with a different name! Download compiled Exe only: 4shared / Media Fire / Softpedia (1.58mb) Distributing copies of the program in compiled format (exe) must be free of any fee! -----> click here to Donate! (Current donators: 1. Cuong N.) It is designed for Win7+ operating systems with AERO enabled! E.g. on WinXP machines some functions are not working properly and might crash the application! AV scanners may have a negative impact the execution of compiled exe and might report any malware. I guarantee that there is no malicious code in the source code / exe!!! Main GUI: About Intro: Basic Image Editor: Watermark: Click link for an enhanced version of Watermark Image. Credits: main code by UEZ additional code (alphabetical order) by Authenticity, AutoItObject Team, Eemuli, Eukalyptus, funkey, _Kurt, martin, monoceres, ProgAndy, taietel, trancexx, Ward, wolf9228 and Yashied! mesale0077 for turkish translation wakillon for french translation AZJIO for russian translation Keys: Main GUI: User your mouse to scroll preview window or Numpad 8: Scroll preview window up Numpad 2: Scroll preview window down Numpad 4: Scroll preview window left Numpad 6: Scroll preview window right Numpad +: zoom in preview window or mouse wheel down Numpad -: zoom out preview window or mouse wheel up F1: capture again on last position F5: refresh Windows Name list PRINTSCREEN: take screenshot from whole screen ALT+PRINTSCR: take a screenshot from active window F10: Undo made changes with Image Editing function F11: take screenshot from whole screen incl mouse cursor F12: take screenshot from whole screen Ctrl+Alt+F9 start "Grab Screen" mode Ctrl+Alt+F12: take a screenshot from active window using alternative screenshot functionality (beta)! Ctrl+r: call ruler Ctrl+s: save current displayed image Ctrl+x: exit program ctrl+w: call web grab input field (available only when Aero is enabled) Ctrl+i: call image editor Ctrl+m: call watermark editor Ctrl+z: undo Only available on Vista+ os: double click with rmb on list items to use alternative screenshot functionality (beta)! When 'Grab Screen' is clicked you can hold down the ctrl key to switch to 'grab controls' mode. Control under mouse will be framed red. ctrl + shift will take the screenshot of appropriate control. To capture GUI menus you can press rmb which simulates the lmb. When a menu is opened press shift additionally to capture it. Press and hold only the shift key to capture any region on the desktop using freehand capturing - release it so capture marked regions! Or just mark resize able area which you want to grab. Press CTRL key to grab marked area or right mouse button to capture the marked area every x seconds for a duration of y seconds. When saving the image just enter the extension you wish to use (*.jpg;*.png;*.bmp;*.gif;*.tif;*.pdf). Big thanks to taietel for his PDF UDF! Image Editor: s: save 😄 copy n: send h: highlighter p: pen r: rectangle e: ellipse a: arrow o: color t: text g: text config Ctrl+z: undo Watermark editor: Ctrl+z: undo To start the app minimized just call it "Windows Screenshooter.exe /min" Maybe it is useful for someone... Any kind of comment is welcome. Br, UEZ Change log:1 point
-
I think it defaults to somewhere here if the folder does not exist: \HKEY_CURRENT_USER\Software\Microsoft\Windows\CurrentVersion\Explorer\ComDlg32\ Couldn't find a quick way to decoded those MRUs properly though. I use a custom version of _FileOpenDialog_Ex() to reset @workingdir to the initial script workingdir (because the new workingdir is blocked from deletion). Add a test to initdir there and you're golden. Func _FileOpenDialog_Ex($sTitle, $sInitDir, $sFilter, $iOptions = 0, $sDefaultName = "", $hWnd = 0) #cs https://groups.google.com/forum/?hl=en&fromgroups=#!topic/microsoft.public.vc.mfc/HafQr4gIRY0 The problem is that GetOpenFileName changes the current directory to the last browsed one. The current directory and any of its parents cannot be deleted. #ce Local $sWorkingDir = @WorkingDir if not StringInStr(FileGetAttrib($sInitDir),"D") then $sInitDir = @ScriptDir Local $sFilename = FileOpenDialog($sTitle, $sInitDir, $sFilter, $iOptions, $sDefaultName, $hWnd) Local $iError = @error FileChangeDir($sWorkingDir) Return SetError($iError, 0, $sFilename) EndFunc ;==>_FileOpenDialog_Ex1 point
-

Creating a "brushed up" Task Scheduler UDF?
FrancescoDiMuro reacted to water for a topic
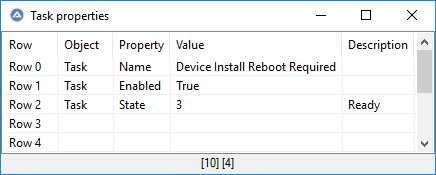
Can we please have a discussion about the format of _TS_TaskPropertiesGet: At the moment it is a bit hard to read (because I have simply translated a VBS example). I could modify the 1D array that works with indenting at the moment to a 2D array with the following columns: Object: ACTIONS, DEFINITIONS, PRINCIPAL ...) The property name (Duration, LogonType, XML ...) The property value ("2PT", 4, "<?xml version=1.0 ..." ...) Description (if available) ("", "Group", "" ...) Example: This way everyone can format the output the way he likes. This 2D array format will be the expert format you could use to create a new task (discussion about this will follow soon).1 point -
The map functions don't work as expected, so don't rely on them too much. Use a scripting.dictionary instead for future proofing, plus not everyone uses the Beta versions.1 point
-
@Inpho You might be interested in the _Map_IniToMap and _Map_MapToIni functions from the Map UDF1 point
-
AdlibRegister() is perfect for the job.1 point
-

Which programming language deserves to be learned?
FrancescoDiMuro reacted to Earthshine for a topic
Welcome. Great to be of service1 point -

Workplace client refusing connect with script?
DannyJ reacted to seadoggie01 for a topic
Like Danp2 says, that's what I do. I'm behind a proxy and sometimes IE will get a redirect or something after I navigate, before I get routed to the original URL. If you don't use IE much, you might be able to attach to the first instance and just wait it out, ignoring whatever url it is using currently.1 point -
Have you tried like this? Local $sURL = "Workplace Webpage Url" _IECreate($sURL, 0, 1, 0) Sleep(2000) Local $oIE = _IEAttach($sURL, "url")1 point
-

Running Excel Macros from AutoIt Work Individually, But Not Sequentially
onderijw reacted to seadoggie01 for a topic
I had a similar issue, so I added some delay (I think 2 seconds?), but found moved to full AutoIt later. It seems like Excel isn't always immediately ready after it's done executing a macro. But as Nine says, this really shouldn't be the way you execute the code. If you can't get everything into AutoIt, at least stop running the 8 macros in a row from AutoIt, just make a macro that calls them and execute the macro once.1 point -
I highly doubt someone could answer to your issue. My first reflex would be to convert everything in autoit using excel and powerpoint UDFs. And use COM whenever required. I believe it would make your life much easier to use only one single technology...1 point
-

RGB imgs to CMYK to TIFF
edpoguatemala reacted to Werty for a topic
On a side note, when manipulating images, use a lossless format like png or bmp, if you use jpg it will degrade the image even further for each step, compressing an already compressed image.1 point -

Arrays 101: All you need to know about them!
BlackLumiere reacted to TheDcoder for a topic
Hello Guys! I wanted to share all my knowledge on arrays! Hope may enjoy the article , Lets start! Declaring arrays! Declaring arrays is a little different than other variables: ; Rules to follow while declaring arrays: ; ; Rule #1: You must have a declarative keyword like Dim/Global/Local before the declaration unless the array is assigned a value from a functions return (Ex: StringSplit) ; Rule #2: You must declare the number of dimensions but not necessarily the size of the dimension if you are gonna assign the values at the time of declaration. #include <Array.au3> Local $aEmptyArray[0] ; Creates an Array with 0 elements (aka an Empty Array). Local $aArrayWithData[1] = ["Data"] _ArrayDisplay($aEmptyArray) _ArrayDisplay($aArrayWithData) That's it Resizing Arrays Its easy! Just like declaring an empty array! ReDim is our friend here: #include <Array.au3> Local $aArrayWithData[1] = ["Data1"] ReDim $aArrayWithData[2] ; Change the number of elements in the array, I have added an extra element! $aArrayWithData[1] = "Data2" _ArrayDisplay($aArrayWithData) Just make sure that you don't use ReDim too often (especially don't use it in loops!), it can slow down you program. Best practice of using "Enum" You might be wondering what they might be... Do you know the Const keyword which you use after Global/Local keyword? Global/Local are declarative keywords which are used to declare variables, of course, you would know that already by now , If you check the documentation for Global/Local there is a optional parameter called Const which willl allow you to "create a constant rather than a variable"... Enum is similar to Const, it declares Integers (ONLY Integers): Global Enum $ZERO, $ONE, $TWO, $THREE, $FOUR, $FIVE, $SIX, $SEVEN, $EIGHT, $NINE ; And so on... ; $ZERO will evaluate to 0 ; $ONE will evaluate to 1 ; You get the idea :P ; Enum is very useful to declare Constants each containing a number (starting from 0) This script will demonstrate the usefulness and neatness of Enums : ; We will create an array which will contain details of the OS Global Enum $ARCH, $TYPE, $LANG, $VERSION, $BUILD, $SERVICE_PACK Global $aOS[6] = [@OSArch, @OSType, @OSLang, @OSVersion, @OSBuild, @OSServicePack] ; Now, if you want to access anything related to the OS, you would do this: ConsoleWrite(@CRLF) ConsoleWrite('+>' & "Architecture: " & $aOS[$ARCH] & @CRLF) ConsoleWrite('+>' & "Type: " & $aOS[$TYPE] & @CRLF) ConsoleWrite('+>' & "Langauge: " & $aOS[$LANG] & @CRLF) ConsoleWrite('+>' & "Version: " & $aOS[$VERSION] & @CRLF) ConsoleWrite('+>' & "Build: " & $aOS[$BUILD] & @CRLF) ConsoleWrite('+>' & "Service Pack: " & $aOS[$SERVICE_PACK] & @CRLF) ConsoleWrite(@CRLF) ; Isn't it cool? XD You can use this in your UDF(s) or Program(s), it will look very neat! Looping through an Array Looping through an array is very easy! . There are 2 ways to loop an array in AutoIt! Simple Way: ; This is a very basic way to loop through an array ; In this way we use a For...In...Next Loop! Global $aArray[2] = ["Foo", "Bar"] ; Create an array ; This loop will loop 2 times because our $aArray contains 2 elements. For $vElement In $aArray ; $vElement will contain the value of the elements in the $aArray... one element at a time. ConsoleWrite($vElement & @CRLF) ; Prints the element out to the console Next ; And that's it! Advanced Way: ; This is an advanced way to loop through an array ; In this way we use a For...To...Next Loop! Global $aArray[4] = ["Foo", "Bar", "Baz", "Quack"] ; Create an array ; This loop will loop 2 times because our $aArray contains 2 elements. For $i = 0 To UBound($aArray) - 1 ; $i is automatically created and is set to zero, UBound($aArray) returns the no. of elements in the $aArray. ConsoleWrite($aArray[$i] & @CRLF) ; Prints the element out to the console. Next ; This is the advanced way, we use $i to access the elements! ; With the advanced method you can also use the Step keyword to increase the offset in each "step" of the loop: ; This will only print every 2nd element starting from 0 ConsoleWrite(@CRLF & "Every 2nd element: " & @CRLF) For $i = 0 To UBound($aArray) - 1 Step 2 ConsoleWrite($aArray[$i] & @CRLF) Next ; This will print the elements in reverse order! ConsoleWrite(@CRLF & "In reverse: " & @CRLF) For $i = UBound($aArray) - 1 To 0 Step -1 ConsoleWrite($aArray[$i] & @CRLF) Next ; And that ends this section! For some reason, many people use the advance way more than the simple way . For more examples of loops see this post by @FrancescoDiMuro! Interpreting Multi-Dimensional Arrays Yeah, its the most brain squeezing problem for newbies, Imagining an 3D Array... I will explain it in a very simple way for ya, so stop straining you brain now! . This way will work for any array regardless of its dimensions... Ok, Lets start... You can imagine an array as a (data) mine of information: ; Note that: ; Dimension = Level (except the ground level :P) ; Element in a Dimension = Path ; Level 2 ----------\ ; Level 1 -------\ | ; Level 0 ----\ | | ; v v v Local $aArray[2][2][2] ; \-----/ ; | ; v ; Ground Level ; As you can see that $aArray is the Ground Level ; All the elements start after the ground level, i.e from level 0 ; Level 0 Contains 2 different paths ; Level 1 Contains 4 different paths ; Level 2 Contains 8 different paths ; When you want too fill some data in the data mine, ; You can do that like this: $aArray[0][0][0] = 1 $aArray[0][0][1] = 2 $aArray[0][1][0] = 3 $aArray[0][1][1] = 4 $aArray[1][0][0] = 5 $aArray[1][0][1] = 6 $aArray[1][1][0] = 7 $aArray[1][1][1] = 8 ; Don't get confused with the 0s & 1s, Its just tracing the path! ; Try to trace the path of a number with the help of the image! Its super easy! :D I hope you might have understand how an array looks, Mapping your way through is the key in Multi-Dimensional arrays, You take the help of notepad if you want! Don't be shy! Frequently Asked Questions (FAQs) & Their answers Q #1. What are Arrays? A. An Array is an datatype of an variable (AutoIt has many datatypes of variables like "strings", "integers" etc. Array is one of them). An Array can store information in a orderly manner. An Array consist of elements, each element can be considered as a variable (and yes, each element has its own datatype!). AutoIt can handle 16,777,216 elements in an Array, If you have an Array with 16,777,217 elements then AutoIt crashes. Q #2. Help! I get an error while declaring an Array!? A. You tried to declare an array like this: $aArray[1] = ["Data"] That is not the right way, Array is a special datatype, since its elements can be considered as individual variables you must have an declarative keyword like Dim/Global/Local before the declaration, So this would work: Local $aArray[1] = ["Data"] Q #3. How can I calculate the no. of elements in an array? A. The UBound function is your answer, Its what exactly does! If you have an multi-dimensional Array you can calculate the total no. of elements in that dimension by specifying the dimension in the second parameter of UBound Q #4. Why is my For...Next loop throwing an error while processing an Array? A. You might have done something like this: #include <MsgBoxConstants.au3> Local $aArray[10] = [1, 2, 3, 4, 5, 6, 7, 8, 9, 10] Local $iMyNumber = 0 For $i = 0 To UBound($aArray) ; Concentrate here! $iMyNumber += $aArray[$i] Next MsgBox($MB_OK, "Sum of all Numbers!", $iMyNumber) Did you notice the mistake? UBound returns the no. of elements in an array with the index starting from 1! That's right, you need to remove 1 from the total no. of elements in order to process the array because the index of an array starts with 0! So append a simple - 1 to the statment: #include <MsgBoxConstants.au3> Local $aArray[10] = [1, 2, 3, 4, 5, 6, 7, 8, 9, 10] Local $iMyNumber = 0 For $i = 0 To UBound($aArray) - 1 $iMyNumber += $aArray[$i] Next MsgBox($MB_OK, "Sum of all Numbers!", $iMyNumber) Q #5. Can an Array contain an Array? How do I access an Array within an Array? A. Yes! It is possible that an Array can contain another Array! Here is an example of an Array within an Array: ; An Array can contain another Array in one of its elements ; Let me show you an example of what I mean ;) #include <Array.au3> Global $aArray[2] $aArray[0] = "Foo" Global $aChildArray[1] = ["Bar"] $aArray[1] = $aChildArray _ArrayDisplay($aArray) ; Did you see that!? The 2nd element is an {Array} :O ; But how do we access it??? ; You almost guessed it, like this: ; Just envolope the element which contains the {Array} (as shown in _ArrayDisplay) with brackets (or parentheses)! :D ConsoleWrite(($aArray[1])[0]) ; NOTE the brackets () around $aArray[1]!!! They are required or you would get an syntax error! ; So this: $aArray[1][0] wont work! More FAQs coming soon!1 point -
Quote from a statement made by Jon in a private forum: So he won't be including it as it is, but it did stay in Beta for the moment. Don't hold your breath though to get this fixed and included. Jos0 points


