Leaderboard
Popular Content
Showing content with the highest reputation on 02/25/2019 in all areas
-

OutlookTools: Import/Export from/to iCal/vCard/CSV
FrancescoDiMuro and one other reacted to water for a topic
I'm sure Outlook wouldn't be able to directly process such nested objects. My tools will parse the input files, map iCal/vCard properties to Outlook item properties and then create the Outlook items. My primary goal is to implement the simple and widely used components and properties. Later on (if ever) I will spend some time with those exotic features So you would b on the safer side to use two separate files.2 points -
It's about running exe from memory as it's often called. So you have some binary data that you want to embed in your script and run afterward like some additional program. In this post I will try to explain how to do it. First to deal with mentioned binary as that's, in spite of the plainness of retrieving it, often insuperable. To avoid questions about that this is one way of getting it: Global $sModule = "E:Program filesGUIDGenGUIDGEN.EXE" ; change to yours wanted Global $hModule = FileOpen($sModule, 16) If @error Then Exit Global $bBinary = FileRead($hModule) FileClose($hModule) Global Const $MAX_LINESIZE = 4095 Global $iNewLine, $j Global $iChinkSize = 32 Global $sBinary For $i = 1 To BinaryLen($bBinary) Step $iChinkSize $j += 1 If 4*($j * $iChinkSize) > $MAX_LINESIZE - 129 Then $iNewLine = 1 EndIf If $iNewLine Then $iNewLine = 0 $j = 0 $sBinary = StringTrimRight($sBinary, 5) $sBinary &= @CRLF & '$bBinary &= "' & StringTrimLeft(BinaryMid($bBinary, $i, $iChinkSize), 2) & '" & _' & @CRLF ContinueLoop EndIf If $i = 1 Then $sBinary &= '$bBinary = "' & BinaryMid($bBinary, $i, $iChinkSize) & '" & _' & @CRLF Else $sBinary &= ' "' & StringTrimLeft(BinaryMid($bBinary, $i, $iChinkSize), 2) & '" & _' & @CRLF EndIf Next $sBinary = StringTrimRight($sBinary, 5) ClipPut($sBinary) ConsoleWrite($sBinary)Now for what's really important... Executable file causes a computer to perform indicated tasks according to encoded instructions. Files that we talk about are in PE format. When exe file is run special loader reads it and performs act of loading. That's how that particular exe gets in touch with a processor. Processor then executes different actions described by the opcodes. Main requirement for any PE file required by the loader is for it to actually exist. To be written on the drive. It can't be in the air. That's not allowed and when you think of it it's only logical. So how to run from memory? I'm gonna fool the system. It will think that all works as it should and will have no idea that it plays my game. There is more than way of doing that. Method described here has been used by different peoples before. When doing research for this post I have encountered many implementations. And I must say that I was very disappointed seeing that even the writers of the code often lack understanding of it. It's kind of pathetic when you see some code used and when asking author what's this or that you get answer "I don't know". And if you ask for the code to be explained by words (any fucking human language) coders fail terribly. How can you write code if you can't explain it?!? Anyway, this is the procedure: Start your script Create new process using CreateProcess function with CREATE_SUSPENDED flag Use GetThreadContext function to fill CONTEXT structure Read and interpret passed binary Allocate enough memory for the new module inside the victim process Simulate loader. Construct the new module (load) in place of allocated space. Make use of mentioned CONTEXT structure. Change entry point data and ImageBaseAddress data. Resume execution If all that went well windows should now be running not the original module but the new, saved in script as a variable. The script: RunBinary.au3 Script is well commented so it shouldn't be too hard to get a grip. New script is taking all possible advantages of PE format. That means if your module (embedded) has relocation directory it will run for sure.If not it could fail. When it will fail? Modules with no reloc directory (IMAGE_DIRECTORY_ENTRY_BASERELOC) ought to be loaded at precise address (stored within module; IMAGE_OPTIONAL_HEADER ImageBase). If for some reason not enough space can be allocated at that address within victim's memory space, function will fail. Thing is system makes rules, if we are not allowed to some memory space of a process there is nothing to do then to try again. So, try again if it fails. Maybe change the 'victim'. edit: 64bit support added. That means you can embed either x64 or x86 modules. If your AutoIt is x64 you embed x64 modules. If AutoIt is x86 embed x86. x64 AutoIt could also use embedded x86 modules but I don't like that because needed structures would have to be changed to something that's not meeting aesthetics standards .1 point
-

Artificial Intelligence - Bot path finding
user4157124 reacted to Toady for a topic
A * Searching Algorithm - Pronounced "A star" UPDATED: Dec 1, 2015 A bot path searching algorithm that will find the shortest and least cost path to the final state (goal). I wrote an example to visually explain how this is used in the real world. This type of bot searching is commonly used in games that are based on a grid system. The images below are taken from the example program that you can get below this description. For example, say we have a map of some terrain. Shown below. The bot must reach the goal with the shortest distance possible (if the path exists). The bot must also take into account different terrain types, each of them have their own difficulty level of traveling. The easiest type of terrain to move on is flat ground, so the bot will choose this over any other. The difficulty levels are ordered from easiest to hardest below. Easy - Flat ground Medium - Sand Hard - Water Very Hard - Hill The bot then searches all possible nodes, only searching those that are the easiest to travel on as well as those closest to the goal. Below shows the nodes that the bot searches denoted with a yellow block "SN". Note that not all the nodes on the grid are searched, that is why this algorithm is so fast. The bot then calculates the shortest and easiest path to get to the goal only using those searched nodes. Below is the path the bot takes. NOTE RULES: 1. There must be a Start and a Goal. 2. The path does not have to exist. Here is a screen shot of the program that lets you play around with it for fun. Below is a GUI example that lets you see how this works. Download the script below the screen shot. A_Star.au31 point -

Disable a certain windows sound
FrancescoDiMuro reacted to Bert for a topic
here is the answer you are looking for: http://bfy.tw/MTD8 It will tell you exactly how to deal with that sound issue.1 point -

Disable a certain windows sound
Earthshine reacted to JLogan3o13 for a topic
I guess I am not understanding why you need code. If you don't want a particular sound, go into control panel>>change system sounds and disable the appropriate sound.1 point -
Try $formula1="=MID(B"& $utakmice & ',SEARCH("-",B' &$utakmice&")-1,1)"1 point
-

Run data from inside a file without having it stored on the Hard Drive
Earthshine reacted to Gianni for a topic
You have to transform your exe file in a long binary string and embed it in your script. From there it can be 'executed' without saving it back to disk again. In short it's executed as if it's a function within your main script. You can see how to do in this post by the guru @trancexx1 point -
simpler way - just use the time functions to look for a specific time. once it is that time, then kick off the function.1 point
-
I will do my very best Next on the list: VCard import Putting everything together into a single UDF (iCal import, VCF import etc.) and rename the thing to OutlookTools.au3. Add timezone support What do you think?1 point
-

Display results of "getElementsByClassName"
Eggie6 reacted to alienclone for a topic
if your result is an array, you should use _ArrayDisplay to view them. so something like... _ArrayDisplay($oCollection) or maybe to show only item 4... MsgBox(0, "", $oCollection[3])1 point -
Barnsley Fractal Fern
user4157124 reacted to Larnil for a topic
This script generates Barnsleys Fractal Fern using script only. ; version 2017-10-03 ; Barnsley Fractal Fern ; by larnil #include <GUIConstants.au3> Dim $x, $y, $xn, $yn, $n, $r, $dc $WinSize = 800 ; window size ;Create graphics windows AutoItSetOption("GUIOnEventMode", 1) $GUI = GUICreate("Barnsley Fractal Fern", $WinSize, $WinSize, -1, -1) $Graphic = GuiCtrlCreateGraphic(0, 0, $WinSize, $WinSize) GUICtrlSetBkColor(-1, 0x000000) GUICtrlSetGraphic(-1,$GUI_GR_COLOR, 0x00ff00) GUISetState(@SW_SHOW) GUISetOnEvent($GUI_EVENT_CLOSE,"Bye") ;Main $start = TimerInit() _Fern(800) ; hight of fern - can be larger than window MsgBox(0,"Time taken:",Round(TimerDiff($start)/1000,3) &" seconds") While 1 Sleep(100) WEnd Func Bye() Exit EndFunc Func _Fern($height) $f = $height/10.6 ; scale factor. Complete fern is within 0 <= y <= 9.9983 (with no scale) $offset_x = $height/2 - $height/40 ; Side adjustment. Fern is within −2.1820 < x < 2.6558 (with no scale) For $n = 1 To $height*200 ; Number of iterations $r = Random(0, 99, 1) Select Case $r < 85 ; 0-84 = 85% of the time $xn = 0.85 * $x + 0.04 * $y $yn = -0.04 * $x + 0.85 * $y + 1.6 Case $r > 84 AND $r < 92 ; 85-91 = 7% of the time $xn = 0.2 * $x - 0.26 * $y $yn = 0.23 * $x + 0.22 * $y + 1.6 Case $r > 91 AND $r < 99 ; 92-98 = 7% of the time $xn = -0.15 * $x + 0.28 * $y $yn = 0.26 * $x + 0.24 * $y + 0.44 Case Else ; 99-99 = 1% of the time $xn = 0 $yn = 0.16 * $y EndSelect $x = $xn $y = $yn GUICtrlSetGraphic($Graphic, $GUI_GR_PIXEL, $offset_x + $x * $f, $height - $y * $f) Next GUICtrlSetGraphic($Graphic, $GUI_GR_REFRESH) EndFunc ;==> Fern Here is another example where I have used GDI (my very first attempt at using GDI by the way). This script can generate much larger Ferns and save them to file (png). I have used this script to generate a 20000 x 20000 pixel @ 600 dpi image. Looks really good printed out in full size. #include <GDIPlus.au3> #include <GUIConstantsEx.au3> ; Param Local Const $iPxColor = 0xFF00FF00 ; Pixel color for fractal Alpha/R/G/B Local Const $iBgColor = 0xFFFFFFFF ; Background color for image Alpha/R/G/B Local Const $iSize = 1000 ; Hight of fern in pixels - image will have this hight and width too Local Const $iIter = $iSize*400 ; Number of iterations - $iSize * 200 is a good starting point ; Call function ;$start = TimerInit() _Fern($iSize,$iIter) ;MsgBox(0,"Time taken:",Round(TimerDiff($start)/1000,3) &" seconds") ; Function for generating Barnsley Fractal Fern Func _Fern($Size,$Iter) _GDIPlus_Startup() ; initialize GDI+ Local $hBitmap = _GDIPlus_BitmapCreateFromScan0($Size, $Size) ; create an empty bitmap Local $hBmpCtxt = _GDIPlus_ImageGetGraphicsContext($hBitmap) ; get the graphics context of the image _GDIPlus_GraphicsClear($hBmpCtxt, $iBgColor) ; Set the background color for empty bitmap ; Here the magic happens $x=0 ; init $y=0 ; init $f = $Size/10.6 ; scale factor. Complete fern is within 0 <= y <= 9.9983 (with no scale) $offset_x = $Size/2 - $Size/40 ; Side adjustment. Fern is within −2.1820 < x < 2.6558 (with no scale) For $n = 1 To $Iter ; Number of iterations $r = Random(0, 99, 1) Select Case $r < 85 ; 0-84 = 85% of the time $xn = 0.85 * $x + 0.04 * $y $yn = -0.04 * $x + 0.85 * $y + 1.6 Case $r > 84 AND $r < 92 ; 85-91 = 7% of the time $xn = 0.2 * $x - 0.26 * $y $yn = 0.23 * $x + 0.22 * $y + 1.6 Case $r > 91 AND $r < 99 ; 92-98 = 7% of the time $xn = -0.15 * $x + 0.28 * $y $yn = 0.26 * $x + 0.24 * $y + 0.44 Case Else ; 99-99 = 1% of the time $xn = 0 $yn = 0.16 * $y EndSelect $x = $xn $y = $yn _GDIPlus_BitmapSetPixel($hBitmap, $offset_x + $x * $f, $Size - $y * $f, $iPxColor) ; Change pixel color for calculated X,Y Next ; ==> End of magic $File = "\Fractal_Fern_"&StringRight(Hex($iPxColor),6)&"-"&StringRight(Hex($iBgColor),6)&"-"&$iSize&".png" _GDIPlus_ImageSaveToFile($hBitmap, @MyDocumentsDir & $File) ;save bitmap to disk ShellExecute(@MyDocumentsDir & $File); Show it to the world in your default image viewer ; Cleanup GDI+ resources _GDIPlus_GraphicsDispose($hBmpCtxt) _GDIPlus_BitmapDispose($hBitmap) _GDIPlus_Shutdown() EndFunc ;==> _Fern1 point -

Utilising existing GUI code in koda.
LukeLe reacted to argumentum for a topic
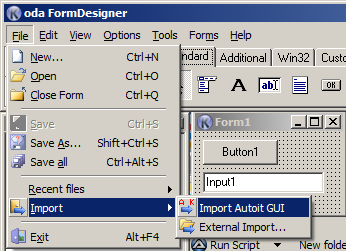
<?xml version="1.0" encoding="windows-1251"?> <object type="TAForm" name="Form1"> <properties> <property name="Left" vt="Int16">254</property> <property name="Top" vt="Int16">188</property> <property name="Width" vt="Int16">156</property> <property name="Height" vt="Int8">108</property> <property name="Caption" vt="String">Form1</property> <property name="Color" vt="Ident">clBtnFace</property> <property name="Font.Charset" vt="Ident">DEFAULT_CHARSET</property> <property name="Font.Color" vt="Ident">clWindowText</property> <property name="Font.Height" vt="Int8">-11</property> <property name="Font.Name" vt="String">MS Sans Serif</property> <property name="Font.Style" vt="Set"/> <property name="OldCreateOrder" vt="True">True</property> <property name="Visible" vt="True">True</property> <property name="Style" vt="Int32">-1798701056</property> <property name="ExStyle" vt="Int16">256</property> <property name="Version" vt="String">1.04</property> <property name="FormOptOnEvent" vt="False">False</property> <property name="FormOptExpVars" vt="False">False</property> <property name="FormOptPopulate" vt="False">False</property> <property name="FormOptVarsForSet" vt="False">False</property> <property name="FormOptIndentChar" vt="Int8">0</property> <property name="FormOptIndentCount" vt="Int8">1</property> <property name="FormOptIndentInit" vt="Int8">0</property> <property name="FormOptVarScope" vt="Int8">2</property> <property name="Resizing" vt="Set"/> <property name="PixelsPerInch" vt="Int8">96</property> <property name="TextHeight" vt="Int8">13</property> </properties> <components> <object type="TAButton" name="Button1"> <properties> <property name="Left" vt="Int8">8</property> <property name="Top" vt="Int8">8</property> <property name="Width" vt="Int8">75</property> <property name="Height" vt="Int8">25</property> <property name="Caption" vt="String">Button1</property> <property name="TabOrder" vt="Int8">0</property> <property name="Color" vt="Ident">clBtnFace</property> <property name="CtrlStyle" vt="Int32">1342373888</property> <property name="CtrlExStyle" vt="Int8">0</property> <property name="Resizing" vt="Set">DockWidth, DockHeight</property> </properties> <components/> </object> <object type="TAInput" name="Input1"> <properties> <property name="Left" vt="Int8">8</property> <property name="Top" vt="Int8">40</property> <property name="Width" vt="Int8">121</property> <property name="Height" vt="Int8">21</property> <property name="TabOrder" vt="Int8">1</property> <property name="Text" vt="String">Input1</property> <property name="CtrlStyle" vt="Int32">1342374016</property> <property name="CtrlExStyle" vt="Int16">512</property> <property name="Resizing" vt="Set">DockHeight</property> </properties> <components/> </object> </components> </object> I don't see anything wrong or missing in Koda. Did I say that I use Koda for everything. I use Koda for everything.1 point -
Bitmap2AscII use Lucida Console font with a size set to 8, so Windows 8/8.1 users need to change their notepad font and size for get a correct display. Image Rescale slider is only available when saving as image. A click on the "PreviewEdit" open AscII string in Notepad. You can save as Text, Html or Image (add the extension you want) Each setting change is immediately applied. Downloads available in the download section Hope you like it !1 point
-
Change Gui Title
GoogleGonnaSaveUs reacted to CyberSlug for a topic
Did you try? Opt("WinTitleMatchMode", 4) $h = GuiCreate("Title One.") GuiSetState() sleep(1000) WinSetTitle("handle=" & $h, "", "Title Two..") sleep(1000) WinSetTitle("handle=" & $h, "", "Title Three...") sleep(1000) WinSetTitle("handle=" & $h, "", "Title Four....") sleep(1000) WinSetTitle("handle=" & $h, "", "Title Five.....")1 point


