Leaderboard
Popular Content
Showing content with the highest reputation on 09/06/2018 in all areas
-
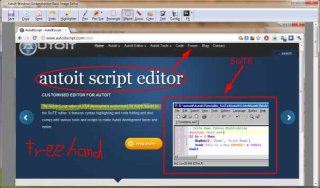
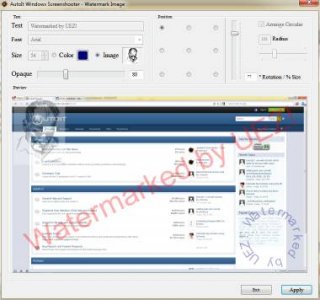
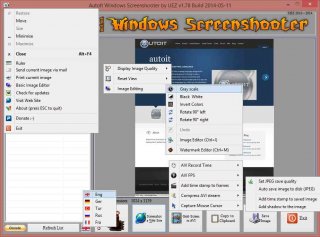
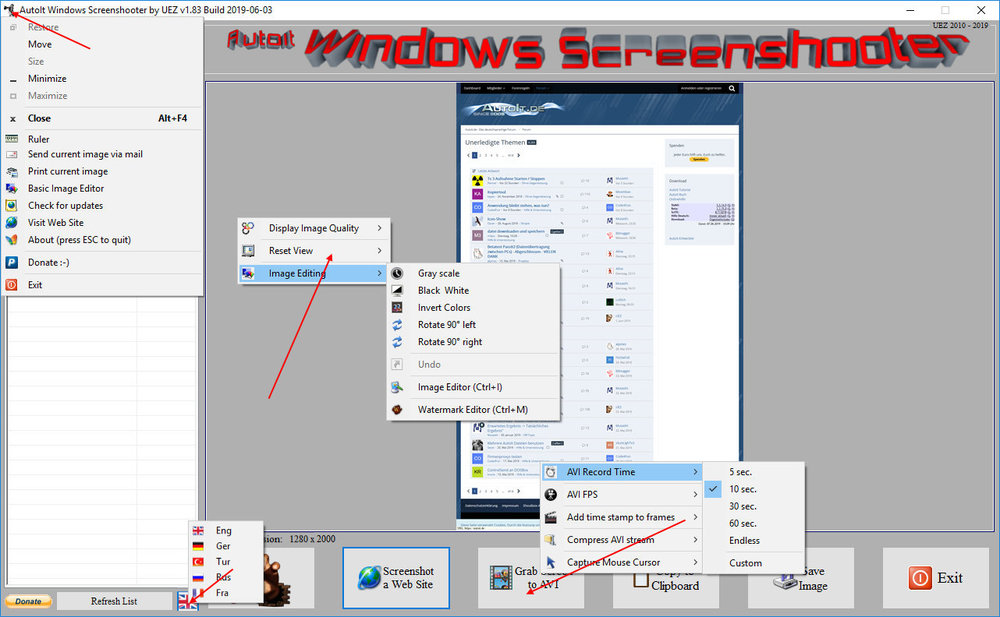
AutoIt Windows Screenshooter Key Features: takes easily a screenshot from any visible window capture any region of the desktop incl. freehand capturing capture GUI controls and GUI menus separately capture a marked area every x seconds for a duration of y seconds create a GIF animation from saved frames (Vista or higher os required) capture to AVI file (without audio!) takes a screenshot from web sites (available only on Win7+ os and when Aero is enabled) put images to clipboard to paste to other applications easily color picker save image in different formats and also to PDF! add timestamp to saved images simple image editing options: greyscale, b&w, invert, rotate +-90° send image to printer and default email client preview of captured screens incl. zoom option multi monitor support display pixel color under mouse ruler basic image editor (paint, highlight, ellipse, rectangle, text and some graphic FX) watermark captured image no 3rd party tools or DLLs used - pure AutoIt! fully portable - no installation is needed multi language feature (Eng, Ger, Tur, Fra and Rus only) drag'n'drop an image to the app for editing To do: capture content of scrollable window/control capture cascaded menus Due to DllCall("User32.dll", "int", "PrintWindow", "hwnd", $hWnd, "handle", $hMemDC, "int", 0) limitation some windows cannot be captured properly (GDI+, ProgDVB, etc.) but can take screenshots of hidden windows. One workaround is to use full screen capturing (F11/F12) or "Grab Screen" function! Or try double click with rmb on listview items (beta). Download source code (10489 downloads previously): AutoIt Windows Screenshooter v1.84 Build 2019-08-18.7z (version 3.3.12.0+ needed!) You are not allowed to sell this code or just parts of it in a commercial project or modify it and distribute it with a different name! Download compiled Exe only: 4shared / Media Fire / Softpedia (1.58mb) Distributing copies of the program in compiled format (exe) must be free of any fee! -----> click here to Donate! (Current donators: 1. Cuong N.) It is designed for Win7+ operating systems with AERO enabled! E.g. on WinXP machines some functions are not working properly and might crash the application! AV scanners may have a negative impact the execution of compiled exe and might report any malware. I guarantee that there is no malicious code in the source code / exe!!! Main GUI: About Intro: Basic Image Editor: Watermark: Click link for an enhanced version of Watermark Image. Credits: main code by UEZ additional code (alphabetical order) by Authenticity, AutoItObject Team, Eemuli, Eukalyptus, funkey, _Kurt, martin, monoceres, ProgAndy, taietel, trancexx, Ward, wolf9228 and Yashied! mesale0077 for turkish translation wakillon for french translation AZJIO for russian translation Keys: Main GUI: User your mouse to scroll preview window or Numpad 8: Scroll preview window up Numpad 2: Scroll preview window down Numpad 4: Scroll preview window left Numpad 6: Scroll preview window right Numpad +: zoom in preview window or mouse wheel down Numpad -: zoom out preview window or mouse wheel up F1: capture again on last position F5: refresh Windows Name list PRINTSCREEN: take screenshot from whole screen ALT+PRINTSCR: take a screenshot from active window F10: Undo made changes with Image Editing function F11: take screenshot from whole screen incl mouse cursor F12: take screenshot from whole screen Ctrl+Alt+F9 start "Grab Screen" mode Ctrl+Alt+F12: take a screenshot from active window using alternative screenshot functionality (beta)! Ctrl+r: call ruler Ctrl+s: save current displayed image Ctrl+x: exit program ctrl+w: call web grab input field (available only when Aero is enabled) Ctrl+i: call image editor Ctrl+m: call watermark editor Ctrl+z: undo Only available on Vista+ os: double click with rmb on list items to use alternative screenshot functionality (beta)! When 'Grab Screen' is clicked you can hold down the ctrl key to switch to 'grab controls' mode. Control under mouse will be framed red. ctrl + shift will take the screenshot of appropriate control. To capture GUI menus you can press rmb which simulates the lmb. When a menu is opened press shift additionally to capture it. Press and hold only the shift key to capture any region on the desktop using freehand capturing - release it so capture marked regions! Or just mark resize able area which you want to grab. Press CTRL key to grab marked area or right mouse button to capture the marked area every x seconds for a duration of y seconds. When saving the image just enter the extension you wish to use (*.jpg;*.png;*.bmp;*.gif;*.tif;*.pdf). Big thanks to taietel for his PDF UDF! Image Editor: s: save 😄 copy n: send h: highlighter p: pen r: rectangle e: ellipse a: arrow o: color t: text g: text config Ctrl+z: undo Watermark editor: Ctrl+z: undo To start the app minimized just call it "Windows Screenshooter.exe /min" Maybe it is useful for someone... Any kind of comment is welcome. Br, UEZ Change log:1 point
-

RdRand - calling Intel's on-chip RNG
argumentum reacted to RTFC for a topic
RdRand is Intel's on-chip hardware random number generator using entropy. This is just a quick response to this query; a faster solution would be to integrate some inline assembly (maybe using fasm?) The dll source is written by Stephen Higgins (blog here); there are several alternative codes available on GitHub as well. Usage for encryption is controversial (there are rumours of an NSA backdoor), but it may provide the closest approach to TRNG using PRNG. This is the 32-bit unsigned version, producing an integer in range: 0 to (4GB-1). Example: ; for dll source, see: https://github.com/viathefalcon/rdrand_msvc_2010 ; NB only some Intel CPUs support this feature $RdRandsupported=_RdRandInit() MsgBox(0,"Is RdRand supported on this CPU?",$RdRandsupported) if $RdRandsupported=False then Exit Global $lowerbound=0 ; NB: negative values are returned as 4GB - value (unsigned int) Global $upperbound=1000 ConsoleWrite("RdRand lower bound: " & $lowerbound & @CRLF) ConsoleWrite("RdRand upper bound: " & $upperbound & @CRLF & @CRLF) For $rc=1 To 100 ConsoleWrite("RdRand: " & @TAB & _RdRand($lowerbound, $upperbound) & @CRLF) Next _RdRandCleanUp() ;################################################################################## Func _RdRandInit() Global $DllHandleRdRand = DllOpen(".\RdRandlib.dll") If @error Then Return SetError(1,0,False) $result=DllCall($DllHandleRdRand, "bool", "rdrand_supported" ) If @error Then Return SetError(1,0,False) Return ($result[0]=1) EndFunc Func _RdRandCleanUp() If IsDeclared($DllHandleRdRand) Then DllClose($DllHandleRdRand) EndFunc Func _RdRand($lower, $upper) $result=DllCall($DllHandleRdRand, "uint", "rdrand_uniform_ex", "uint", $lower, "uint", $upper ) if @error then Return SetError(@error,@extended,False) Return $result[0] EndFunc RdRand.7z1 point -
But do all 4 browser windows show the same link (and the same content?) > if yes, it does not matter witch window is shown on witch monitor, just position them randomly > if no, then the windows shold have different titles... I could not understand your problem1 point
-
_AD_ModifyAttribute. You need to retrieve the value, change it in AutoIt and then use _AD_ModifyAttribute to set the new value.1 point
-
basic question on handles [Solved]
pixelsearch reacted to ajag for a topic
Just show the type of the variables to show the different: [...] $str = "WinGetHandle = '" & $hfn & "'" & @CRLF & "Manual Input = '" & $hmanual & "'" MsgBox($MB_OK + $MB_TOPMOST, "Info", $str) MsgBox($MB_OK + $MB_TOPMOST, "VarTypes", _ "Variable Types" & @CRLF & @CRLF & _ "$hfn : " & @TAB & @TAB & VarGetType($hfn) & " variable type." & @CRLF & _ "$hmanual : " & @TAB & @TAB & VarGetType($hmanual) & " variable type." ) MsgBox($MB_OK + $MB_TOPMOST, "Info", "Flashing window title using handle from WinGetHandle") WinFlash($hfn) [...]1 point -
you could get values directly from within javascript using the ScriptControl itself: Global $oSC = ObjCreate("ScriptControl") $oSC.Language = "JScript" $test = '{"oksdd":true,"result":[{"ss":34}, {"sdes":"332"}]}' $oUpdates = json_decode($test) ConsoleWrite($oSC.Eval('obj.oksdd') & @CRLF) ConsoleWrite($oSC.Eval("obj.result[0].ss") & @CRLF) ConsoleWrite($oSC.Eval("obj.result[1].sdes") & @CRLF) Func json_decode($sJson) $oSC.AddCode("var obj = " & $sJson) If IsObj($oSC.Eval("obj")) Then Return $oSC.Eval("obj") Else Return False EndIf EndFunc ;==>json_decode or, even better, by enabling a fetching of array items with a custom javascript function, say as example Array.Peek, as shown in this nice example by the good @genius257 (https://www.autoitscript.com/forum/topic/176731-autoit-javascript-roundtrip/?do=findComment&comment=1329179). here a possible way: Global $oSC = ObjCreate("ScriptControl") $oSC.Language = "JScript" ; see here https://www.autoitscript.com/forum/topic/176731-autoit-javascript-roundtrip/?do=findComment&comment=1329179 $oSC.Eval("Array.prototype.Peek = function(i){return this[i];}"); enable fetching of array item with Array.Peek function $test = '{"oksdd":true,"result":[{"ss":34}, {"sdes":"332"}]}' $oUpdates = json_decode($test) ConsoleWrite($oUpdates.oksdd & @CRLF) ; read oksdd $myArray = $oUpdates.result ; get the 'map' MsgBox(0,"Debug", "there are " & $myArray.length & " elements in 'result'" & @CRLF & _ $myArray.Peek(0).ss & @CRLF & _ $myArray.Peek(1).sdes) Func json_decode($sJson) $oSC.AddCode("var obj = " & $sJson) If IsObj($oSC.Eval("obj")) Then Return $oSC.Eval("obj") Else Return False EndIf EndFunc ;==>json_decode1 point
-

Using the {enter} key as a Tab
pixelsearch reacted to Melba23 for a topic
ale1981, But what about this: #include <GUIConstantsEx.au3> #include <MsgBoxConstants.au3> #include <WinAPI.au3> $hGUI = GUICreate("Test", 500, 500) $cInput_1 = GUICtrlCreateInput("", 10, 10, 200, 20) $cInput_2 = GUICtrlCreateInput("", 10, 50, 200, 20) $cInput_3 = GUICtrlCreateInput("", 10, 90, 200, 20) $cButton_1 = GUICtrlCreateButton("Button 1", 250, 10, 80, 30) $cButton_2 = GUICtrlCreateButton("Button 2", 250, 50, 80, 30) $cButton_3 = GUICtrlCreateButton("Button 3", 250, 90, 80, 30) $cEnter = GUICtrlCreateDummy() GUISetState() Local $aAccelKeys[2][2] = [["{ENTER}", $cEnter], ["{TAB}", $cEnter]] ; Make {TAB} an accelerator GUISetAccelerators($aAccelKeys) While 1 Switch GUIGetMsg() Case $GUI_EVENT_CLOSE Exit Case $cEnter Switch _WinAPI_GetFocus() Case GUICtrlGetHandle($cInput_1) ; Check the input content If checkEntry() = True Then ; Correct so move to next input GUICtrlSetState($cInput_2, $GUI_FOCUS) EndIf ; Not correct so stay in current input Case GUICtrlGetHandle($cInput_2) If checkEntry() = True Then GUICtrlSetState($cInput_3, $GUI_FOCUS) EndIf Case GUICtrlGetHandle($cInput_3) If checkEntry() = True Then ConsoleWrite("End" & @CRLF) EndIf Case Else GUISetAccelerators(0) ; Remove accelerator link ControlSend($hGUI, "", "", "{TAB}") ; Send {TAB} to the GUI GUISetAccelerators($aAccelKeys) ; Reset the accelerator EndSwitch EndSwitch WEnd Func checkEntry() ; Random chance of correct answer or fail If Mod(@SEC, 2) = 0 Then MsgBox($MB_SYSTEMMODAL, "Test Fail", "Press Enter to close this message box" ) Return False EndIf Return True EndFunc That works for me - you can tab between the buttons without problem. M231 point

