Leaderboard
Popular Content
Showing content with the highest reputation on 02/22/2015 in all areas
-
Three main features are implemented to navigate in an image: Zoom in/out with the mouse wheelClick a point to zoom in/out around this pointDrag the image with the mouse to move it in the picture controlTo zoom in/out the mouse pointer must be located over the picture control. 10 zoom levels are defined with the following zoom factors: 1, 2, 3, 4, 6, 8, 12, 16, 24, 32. A zoom factor of e.g. 24 means, that a pixel in the source image is shown as a 24x24 square in the picture control. When you drag the image with the mouse and then zoom in/out, you'll zoom in/out around the point in the middle of the picture control. The picture shows the GUI and an image of a small forest. The image is zoomed in to zoom factor 3. A pixel in the source image is shown as a 3x3 square in the picture control. To zoom in/out around one of the two lakes, just click in the middle of the lake and zoom in/out, or drag the lake to the middle of the picture control and zoom in/out. Keyboard actions Page Up/Down to zoom in/outArrow keys to move the image a pixel at a timeShift plus arrow keys to move the image a page at a timeTo use the keyboard, the mouse pointer must be located over the picture control. Menu bar The menu bar is not implemented in this version. Tab control The purpose of the tab control is to be able to switch between more images. If you click a tab item, the image in the picture control will be replaced with the image in the tab item. When you switch from one image to another, the image settings are stored and restored. You can change the order of the images by dragging the tab items to the right or left. Right (secondary) click a tab item to get a context menu for the image. Among other things, you can choose colors for the frame and grid (see below) that best fits respectively a bright and dark image. By default colors are set to fit a bright image. Toolbars The left group is the File toolbar. 1) New image2) Open image3) Save image4) Close imageThe right group is the View toolbar.5) View mode6) Center middle point7) Frame is on/off8) Grid is on/offButton 1, 3 and 5 are not implemented in this version. You can right (secondary) click button 6, 7, and 8. Note that all toolbar buttons are provided with tooltips. More details Status bar The status bar is not used in this version. Resize GUI The initial size of the picture control is 6 * 96 pixels for both width and height. 96 is the smallest number that can be divided by all 10 zoom factors (1, 2, 3, 4, 6, 8, 12, 16, 24, 32) without giving a residue. This means, that there is always space for a whole number of pixels in the picture control. This makes all calculations much simpler. E.g. when the image is zoomed in/out, when the image is moved and when the grid is drawn. The GUI and the picture control are resized in steps of 96 pixels. When the picture control is resized, the number of pixels is always increased or decreased with a whole number. Transparent images For a transparent image that really contains transparent pixels, it's necessary to clear the image control each time it's updated. This provides some flicker, especially when the image is moved. For a non-transparent image, it's enough to clear the picture control when the image is zoomed out, and the image is smaller than the picture control. This makes navigation to work much smoother. GIF- and PNG-images support transparency. This doesn't necessarily mean, that the images contain any transparent pixels. To verify that there are transparent pixels, you have to investigate every single pixel, and calculate if it's transparent or not. The investigation can stop, when you find the first transparent pixel, or at the end of the image. This can be time consuming. It's not done in this version. Because of the issue with the flicker, a GIF- or PNG-image is by default set to be non-transparent. If you open a GIF- or PNG-image you have to verify visually, if there are any transparent pixels. If this is the case, then right (secondary) click the tab item, and set the Transparent flag. Merlin.gif and Torus.png (from the AutoIt installation), which are included as test images, does contain transparent pixels. For these images, the Transparent flag is set in the inifile. You can turn off the flag, to see what happens, if it's not set. There is an issue with transparent images. If the picture control only contains pixels, that exactly matches the transparent color, which is set in pixel 0x0 in the source image, the picture control gets black. Settings In this version it's not possible to set and save settings. E.g. a setting to open an image automatically, when the program starts up. The five images that opens automatically, are typed directly into the inifile. This version This version is implemented for use in Non-rectangular selections in an image. Only functionality, that's needed in this example, is coded. The code is not cleaned up according to double defined local variables or unused parameters in function calls (primary functions to handle windows messages). This means a lot of warnings if you run Au3Check. Zipfile The top level is the folder "Image Editor". It contains two subfolders: "1) Navigating in an image" and images. images is five test images. "1) Navigating in an image" contains source and resource files: Navigating.au3 - run this scriptincludesVariables.au3 - common global variablesincludesNavigatingImage.au3 - contains most of the calculationsincludesDrawFunctions.au3 - draw image and graphics on top of imageincludesTabCtrlFunctions.au3 - functions for the tab controlincludesToolbarFunctions.au3 - functions for the toolbarincludestoolsFileToolbar.au3 - code for buttons in File toolbarincludestoolsViewToolbar.au3 - code for buttons in View toolbarincludesModernMenuRaw.au3 - copied from this thread by Holgericons - icon filesTested with AutoIt 3.3.10 on Windows 7 32/64 bit and Windows XP 32 bit. Navigating.7z2 points
-
Hi everyone, Perhaps, if you have a spare moment, you might like to take a look at >Wiki Examples Challenge Part 2 in the Developer Chat section, and do AutoIt and the contestants a favor, by examining the six Examples and casting a vote for one of them. That would be really appreciated. P.S. Jos, etc, Melba23 - I hope you don't mind me posting this here and in GUI Help as well?2 points
-

Wiki Challenge Part 2
jaberwacky and one other reacted to TheSaint for a topic
@Exit - That one already exists. If you read the requirements of this challenge, we aim to be a little more enlightening on the abilities of AutoIt than that. We are trying to show it's simplicity and power (usefulness and flexibility etc). It is indeed pretty difficult to create a simple script that does that. @Everyone should also consider that what might be unacceptable as it is presented here exactly, can be tweaked, just like the winner of the previous challenge. So the idea, is to vote for what appears to be best of the lot, and let things go from there. P.S. Or like kylomas says, we gain a starting point from which we can expand or expound upon. In reality, the discussion and what can be seen as trials perhaps, is a good analytical exercise. For my money, I don't believe any of the examples are perfect. They all have their good points and their bad.2 points -
It could be that none are satisfactory for one reason or another. We would be better served feeding back positive info to Jaberwacky and czardas. Maybe they will take an example and modify it to thier criteria... @Jaberwacky - If none fit your criteria, just say so, you guys are making up the rules.2 points
-
Great idea to post this in the General Help forum Who except the MVPs/Devs go to the Developer Chat section ? The code is intended to beginners thus this vote should be submitted to beginners2 points
-
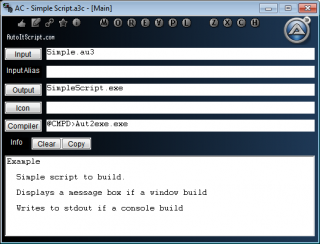
Last updated 9/10/21 * Image may not represent current product Features Simple Integrated countermeasures against file and memory analysis based decompilers. Add basic types of resources into the interpreter or other types as raw data. Define multiple programs to execute pre and post build. Create and include pe version information. User defined patches that can be implemented globally on the interpreter and compiler or selectively. Handles its own basic macro's as well as environment variables in most fields for easier path finding. Drag and drop configs (script bound or separate) to the input edit box or to the icon to load them. Configuration settings can be copied to the clipboard or saved as config files or Au3 scripts. Settings can now be saved directly to an AutoIt3 script. Subsystem independant, can act as a gui or console tool. And much more. See next post for update information. A3C_97.16b.7z A3C_98_18_b.zip1 point
-
Hi every body. Today I want to share this small aplication(source code only) to check Hash in virustotal. (it is not a best coding practices example lol) VirusTotal Hash Checker Allow you to check hash and files in virustotal.com using its Public API service. Aplication Information. -Add one or more Files -Add all files in a folder -Add a MD5 -Add a MD5 File List -Automatic verification -Check Single File -Show Scan -Show Scan in Web -Open in Folder -Clear List Capture: Files in the rar file. VirusTotal Hash Checker.au3 Detected.ico ok.ico wait.ico nofound.ico VirusTotal Hash Checker.rar Saludos1 point
-
Magnifier Functions UDF That magnify tool in Windows since Vista? Yeah, pretty nice feature eh? Well, turns out there's an API that is going unused around here! We've got to change that! MSDN Links: Magnification API Magnifier Functions Magnifier API Overview (includes examples) This UDF exposes most of the useful Magnifier API functions available since Windows Vista. The built-in Magnifier offers very easy screen magnification in the form of Magnifier controls or Full-screen magnification (since Windows 7). It also allows altering the colors of the magnifier or in face the whole screen. With the Magnify API, you can do all sorts of neat things: Create a hardware-accelerated Magnifier control in any GUI (of any size) Resize any part of the screen by any factor (as a floating point value) Alter the colors (invert, grayscale, etc) Ignore certain windows (they become like invisible windows to the magnifier) Full-screen Color Effects (Win 7+ but official as of Win 8) Full-screen Magnify (Win 7+ but official as of Win 8) Windows 7 has 2 Full-screen Magnification API functions that are considered undocumented, but are nearly identical to their Windows 8 documented API counterparts. Therefore, the UDF script takes care of calling the correct API function based on the O/S. The UDF functions are _MagnifierFullScreenSetScale() and _MagnifierFullScreenSetColorEffect(). The only difference in these functions is SetMagnificationDesktopMagnification uses a double for its 1st parameter whereas MagSetFullscreenTransform uses a float. Here's the Win7 undocumented to Win8 documented API mapping: SetMagnificationDesktopColorEffect - MagSetFullscreenColorEffect SetMagnificationDesktopMagnification - MagSetFullscreenTransform There are two examples included in the ZIP archive. The 1st, MagnifierExperiments, shows all the wacky things that can be done using the Magnifier. The 2nd is an example of Inverting screen colors via a Tray interface (both are below). Updates:: Magnifier Experiments: Various Full-screen and Window magnifier effects tests: ; =========================================================================================================== ; <MagnifierExperiments.au3> ; ; Experiments with the Built-In Windows Magnification API (since Windows Vista) ; Uses <WinMagnifier.au3> ; ; NOTE: TRY to run this at the same bit-mode your O/S is running in, as the GUI can be funky at times ; when run in an incompatible bit mode. So for 64-bit O/S's, run this as x64 only! ; ; Check out the Examples from 'Magnification API Overview', where much of the experiments thus far come from ; @ MSDN: http://msdn.microsoft.com/en-us/library/windows/desktop/ms692402%28v=vs.85%29.aspx ; ; Author: Ascend4nt ; =========================================================================================================== ;~ #AutoIt3Wrapper_UseX64=Y ; Use when necessary #include "WinMagnifier.au3" #include <WinAPIGdi.au3> ; _WinAPI_DwmIsCompositionEnabled() #Region MAGNIFIER_EXPERIMENTS ; ============================================================================= ; Func _MagnificationExperiments($nWidth, $nHeight, $iX1, $iY1, ; $fMagFactor = Default, $bInvertColors = 1, ; $bShowCursor = False) ; ; ; Author: Ascend4nt ; ============================================================================= Func _MagnificationExperiments($nWidth, $nHeight, $iX1, $iY1, $fMagFactor = Default, $bInvertColors = False, $bShowCursor = False) Local $aTmp, $aColorFX, $hMagnifyGUI, $hMagnifyCtrl ;~ If Not _MagnifierInit() Then Return SetError(@error, 0, 0) $aTmp = _MagnifierGUICreate($nWidth, $nHeight, $iX1, $iY1, $bInvertColors, $bShowCursor) If @error Then Return SetError(@error, 0, 0) $hMagnifyGUI = $aTmp[0] $hMagnifyCtrl = $aTmp[1] ; Optionally make the window Topmost ;~ WinSetOnTop($hMagnifyGUI, "", 0) ; ------------------------- ; -- MAGNIFICATION SCALE -- If $fMagFactor <> Default Then _MagnifierSetScale($hMagnifyCtrl, $fMagFactor) EndIf ; ------------------------- ; ------------------ ; -- SET SOURCE (on screen) -- ;~ _MagnifierSetSource($hMagnifyCtrl, 0, 0, 200, 100) ; ------------------ ; ------------------ ; Exclude Windows! _MagnifierSetWindowFilter($hMagnifyCtrl, WinGetHandle("[CLASS:SciTEWindow]")) ; ------------------ ConsoleWrite("InvertColors flag (MS_INVERTCOLORS) set? = " & _MagnifierIsInvertColorsStyle($hMagnifyCtrl) & @LF) ; ------------------ ; SHOW IT! GUISetState(@SW_SHOW, $hMagnifyGUI) MsgBox(0, "Normal Magnify", "Normal 2x scale") ; Inverted Colors Dim $aColorFX[5][5] = [ _ [-1.0, 0, 0, 0, 0], _ [ 0, -1.0, 0, 0, 0], _ [ 0, 0, -1.0, 0, 0], _ [ 0, 0, 0, 1.0, 0], _ [1.0, 1.0, 1.0, 0, 1.0] ] _MagnifierSetColorEffect($hMagnifyCtrl, $aColorFX) MsgBox(0, "Inverted Colors via ColorFX", "Inverted Colors via ColorEffects") ;~ _MagnifierSetInvertColorsStyle($hMagnifyCtrl, True) ;~ MsgBox(0, "Inverse Color Style", "Inverse Effect Color Style (control style)") ; ------------------ ;~ $aColorFX = _MagnifierGetColorEffect($hMagnifyCtrl) ;~ _ArrayDisplay($aColorFX, "Color Effects Matrix") ; ------------------ ; -- CLEAR COLOR EFFECTS -- _MagnifierClearColorEffects($hMagnifyCtrl) ; ------------------ ; Still set after Setting Color Effects to Identity Matrix (restored original colors) ;~ ConsoleWrite("InvertColors flag (MS_INVERTCOLORS) set? = " & _MagnifierIsInvertColorsStyle($hMagnifyCtrl) & @LF) ; ------------------------- ; -- SET SOURCE AGAIN -- _MagnifierSetSource($hMagnifyCtrl, $iX1 + 100, $iY1 + 100, $iX1 + $nWidth, $iY1 + $nHeight) MsgBox(0, "Source Change", "Moved Source & Cleared Effects") ; ------------------ ; -- COLOR EFFECTS -- If 1 Then _MagnifierSetColorEffect($hMagnifyCtrl, $COLOR_EFFECTS_GRAYSCALE_MATRIX) MsgBox(0, "Grayscale", "Grayscale Color Effects") EndIf ; ------------------ GUIDelete($hMagnifyGUI) Return 1 EndFunc #Region MAIN_CODE _WinMain() ; ------------------= MAIN CODE =----------------------- Func _WinMain() ; Force restart with AutoIt x64 if running on a 64-bit O/S If @OSArch = "X64" And Not @AutoItX64 And Not _IsScriptCompiledToExe() Then Exit ShellExecute(StringReplace(@AutoItExe, ".exe", "_x64.exe", -1),'/AutoIt3ExecuteScript "' & @ScriptFullPath & '"', @WorkingDir) EndIf ; Setting DWM off has these effects: ; - Full-screen Magnifier Color Effects AND Magnification do NOT work ; - Magnifier Control will not 'ignore' windows with _MagnifierSetWindowFilter() ; - Magnified images tend to look blurry - possibly software-mode magnification? ; Force DWM off so Full-screen Effect tests don't run ;_WinAPI_DwmEnableComposition(False) If Not _MagnifierInit() Then Exit @error ; Magnifier Full-screen Effects Require DWM Composition to be enabled If _WinAPI_DwmIsCompositionEnabled() Then If _MagnifierFullScreenSetColorEffect($COLOR_EFFECTS_GRAYSCALE_MATRIX) Then MsgBox(0, "Full-screen Magnify FX", "Gray-scale Color Effects!") ;~ $aColorFX = _MagnifierFullScreenGetColorEffect() ;~ _ArrayDisplay($aColorFX, "Full-screen matrix after Grayscale Transform") _MagnifierFullScreenClearColorEffects() MsgBox(0, "Full-screen Magnify FX", "Colors back to normal! Yay?") EndIf ; Full-screen Magnifier issues: ; - Windows Vista: Not supported ($g_nWinMagnifyAPILevel = 1) ; - Windows 7: Uses negative numbers, not entirely sure of how these values are mapped just yet ; - Windows 8: Works pretty much as expected (and documented) - use positive #'s indicating top-left of scaled screen If $g_nWinMagnifyAPILevel >= 7 Then Local $bRet ; Difference in calculations for Win7 and Win8 - need a consistent mapping method! If $g_nWinMagnifyAPILevel = 7 Then _MagnifierFullScreenSetScale(2.0, -1 * @DesktopWidth / 2, -1 * @DesktopHeight / 2) Else ; $g_nWinMagnifyAPILevel >= 8 _MagnifierFullScreenSetScale(2.0, @DesktopWidth / 4, @DesktopHeight / 4) EndIf MsgBox(0, "Full-screen Scale FX", "Scaled 2x") _MagnifierFullScreenSetScale(1.0) MsgBox(0, "Full-screen Scale FX", "Back to 1x scale") EndIf ; Brightness Lowering isolated (Contrast & Saturation look bad) Dim $aColorFX[5][5] = [ _ [ 1.0, 0, 0, 0, 0], _ [ 0, 1.0, 0, 0, 0], _ [ 0, 0, 1.0, 0, 0], _ [ 0, 0, 0, 1.0, 0], _ [-0.5, -0.5, -0.5, 0, 1.0] ] ; Brightness - Lowering - Color Components Dim $aColorFX[5][5] = [ _ [0.6, 0, 0, 0, 0], _ [ 0, 0.6, 0, 0, 0], _ [ 0, 0, 0.6, 0, 0], _ [ 0, 0, 0, 1.0, 0], _ [ 0, 0, 0, 0, 1.0] ] _MagnifierFullScreenSetColorEffect($aColorFX) MsgBox(0, "Brightness Lowered Fullscreen", "Fullscreen ColorEffects - Brightness Reduced") ; Verify effects (false here): ;ConsoleWrite("Inversion Matrix Comparison Result:" & _MagnifierColorEffectIsEqual(_MagnifierFullScreenGetColorEffect(), $COLOR_EFFECTS_INVERSION_MATRIX) & @LF) _MagnifierFullScreenSetColorEffect($COLOR_EFFECTS_INVERSION_MATRIX) MsgBox(0, "Inverted Fullscreen", "Fullscreen ColorEffects - Inversion." & @CRLF & _ "Inversion Matrix Comparison Result:" & _MagnifierColorEffectIsEqual(_MagnifierFullScreenGetColorEffect(), $COLOR_EFFECTS_INVERSION_MATRIX)) #cs ; Inverted Colors - Lowered Brightness (adding to color components, reducing brightness components) Dim $aColorFX[5][5] = [ _ [-0.7, 0, 0, 0, 0], _ [ 0, -0.7, 0, 0, 0], _ [ 0, 0, -0.7, 0, 0], _ [ 0, 0, 0, 1.0, 0], _ [0.7, 0.7, 0.7, 0, 1.0] ] _MagnifierFullScreenSetColorEffect($aColorFX) MsgBox(0, "Inverted LB Fullscreen", "Fullscreen ColorEffects - Inversion Lowered Brightness") #ce #cs ; Inverted Colors - Increased Brightness Dim $aColorFX[5][5] = [ _ [-1.3, 0, 0, 0, 0], _ [ 0, -1.3, 0, 0, 0], _ [ 0, 0, -1.3, 0, 0], _ [ 0, 0, 0, 1.0, 0], _ [1.3, 1.3, 1.3, 0, 1.0] ] _MagnifierFullScreenSetColorEffect($aColorFX) MsgBox(0, "Inverted IB Fullscreen", "Fullscreen ColorEffects - Inversion Increased Brightness") #ce ;~ _MagnifierFullScreenSetColorEffect($COLOR_EFFECTS_BW_MATRIX) ;~ MsgBox(0, "Black & White Fullscreen", "Black & White Fullscreen ColorEffects") _MagnifierFullScreenSetColorEffect($COLOR_EFFECTS_SEPIA_TONE_MATRIX) MsgBox(0, "Sepia FullScreen", "Sepia Fullscreen ColorEffects") _MagnifierFullScreenClearColorEffects() MsgBox(0, "Color Restored", "Restored Normal Colors") EndIf ; IMPORTANT - Magnification GUI will fail to work properly sometimes if run in x86 mode on a 64bit O/S ; For this reason, ALWAYS run the Magnification code in the SAME bit-mode as the O/S (x86 in 32-bit O/S's, x64 in 64-bit O/S's) ;~ ConsoleWrite("Title = " & WinGetTitle("[CLASS:SciTEWindow]") & @CRLF) _MagnificationExperiments(@DesktopWidth, @DesktopHeight / 2, 0, @DesktopHeight / 2, 2.0) EndFunc #EndRegion MAIN_CODE #EndRegion MAGNIFIER_EXPERIMENTS #Region MISC_FUNCTIONS ; ============================================================================= ; Func _IsScriptCompiledToExe() ; ; Returns True if the Script has been compiled to an Executable. ; Returns False for .AU3 and .A3X-compiled scripts, as well as scripts run from a different executable ; (CompiledScript.exe /AutoIt3ExecuteScript AnotherScript.exe) ; ; The common method for checking @Compiled is error-prone especially when a script is compiled to .A3X ; To deal with this annoying oversight by the devs (who could easily make @Compiled return -1 for A3X), ; this function checks the path to executable against the script path to make sure they are 1 and the same ; ; While this doesn't detect scripts run from another executable, the situation is basically the same ; - the script still does not have access to the original executable file's resources ; ; Author: Ascend4nt ; ============================================================================= Func _IsScriptCompiledToExe() Return (@Compiled And @AutoItExe = @ScriptFullPath) EndFunc #EndRegion MISC_FUNCTIONS _ Screen Inverter: Toggle full-screen Color Inversion on and off via the Tray: ; =========================================================================================================== ; <MagnifierScreenInverter.au3> ; ; Simple Full-Screen Color Inversion example. Toggle Color Inversion on/off via Tray. ; Important: Requires Win 7+ ; ; Note: May work cleaner if run in same bitness (32/64) as O/S.. it seems some transitions in DWM ; cause the Magnifier tool (magnifier.exe) to crash if used in conjunction with this script. ; ; Uses <WinMagnifier.au3> ; ; Author: Ascend4nt ; =========================================================================================================== ;~ #AutoIt3Wrapper_UseX64=Y ; Optional, may work better if in same bitness as O/S #include "WinMagnifier.au3" #include <WinAPIGdi.au3> ; _WinAPI_DwmIsCompositionEnabled() Global $g_bDwmActive = False Global $g_bInvertOn = False, $g_cTrayInvertToggle = 0 #Region MAIN_CODE Exit _WinMain() Func _WinMain() ; Singleton code: If WinExists("0bc53fe0-59c2-11e2-bcfd-0800200c_9a66") Then Return 1111 AutoItWinSetTitle("0bc53fe0-59c2-11e2-bcfd-0800200c_9a66") ; Vista Minimum for Magnifier, but Full-Screen FX requires Win7+ If Not _MagnifierInit() Or $g_nWinMagnifyAPILevel <= 1 Then Return @error Opt("TrayOnEventMode", 1) Opt("TrayMenuMode", 1+2) Opt("GUIOnEventMode", 1) If Not _WinAPI_DwmIsCompositionEnabled() Then If MsgBox(32 + 3, "Warning: DWM is OFF", _ "Desktop Composition is OFF, which makes Color Inversion Impossible" & @CRLF & _ "unless Re-Enabled!" & @CRLF & _ "Would you like to run this program anyway? ") <> 6 Then Return 2222 EndIf TraySetClick(8) $g_cTrayInvertToggle = TrayCreateItem("Invert Colors Toggle") TrayItemSetOnEvent(-1, "_ToggleInvertColors") TrayCreateItem("") TrayCreateItem("Exit") TrayItemSetOnEvent(-1, "_Exit") ; Automatically Invert on Left-Click Icon TraySetOnEvent(-7, "_ToggleInvertColors") ; $TRAY_EVENT_PRIMARYDOWN -7 TraySetToolTip("Screen Color Inverter (Left-Click Toggles, Right-Click For Menu)") #cs ; OPTIONAL: ; Create a Dummy GUI so we can receive and react to WM_DWMCOMPOSITIONCHANGED Messages Local $hDummyGUI = GUICreate("") GUIRegisterMsg(0x031E, "_DwmCompositionChange") ; WM_DWMCOMPOSITIONCHANGED 0x031E #ce ; Not necessary, but can free some memory by flushing data to disk DllCall("psapi.dll", "bool", "EmptyWorkingSet", "handle", -1) While 1 Sleep(50) WEnd EndFunc #EndRegion MAIN_CODE #Region TRAY_ONEVENT_FUNCS Func _ToggleInvertColors() If $g_bInvertOn Then TrayItemSetState($g_cTrayInvertToggle, 4) _MagnifierFullScreenClearColorEffects() ;~ ConsoleWrite("Inversion: OFF"&@LF) $g_bInvertOn = False Else ; Magnifier Full-screen Effects Require DWM Composition to be enabled If _WinAPI_DwmIsCompositionEnabled() Then TrayItemSetState($g_cTrayInvertToggle, 1) _MagnifierFullScreenSetColorEffect($COLOR_EFFECTS_INVERSION_MATRIX) ;~ ConsoleWrite("Inversion: ON"&@LF) $g_bInvertOn = True EndIf EndIf EndFunc #cs ; OPTIONAL: Func _DwmCompositionChange($hWnd, $nMsg, $wParam, $lParam) ConsoleWrite("DwmCompositionChanged!"&@LF) If _WinAPI_DwmIsCompositionEnabled() Then $g_bDwmActive = True If $g_bInvertOn Then ; Doesn't appear to be necessary (state is recovered): ;_MagnifierFullScreenSetColorEffect($COLOR_EFFECTS_INVERSION_MATRIX) EndIf Else $g_bDwmActive = False EndIf Return 0 EndFunc #ce Func _Exit() _MagnifierUnInit() Exit EndFunc #EndRegion TRAY_ONEVENT_FUNCS WinMagnifier.zip ~prev downloads: 481 point
-
You should read and download Navigating in an image before you read and download this example. The first example shows how to navigate in an image, and the zipfile contains the test images. The first example contains an illustration of the GUI. The example The picture to the left shows a triangular selection. It's shown with a zoom factor of 24. Each 24x24 square equals a single pixel in the source image. The oblique lines in the triangle cut across the 24x24 squares. But a selection in the source image can only include entire pixels. The horizontal/vertical polygon in the middle picture contains pixels that are completely inside the triangle. Pixels at borders are not included. The horz/vert polygon on the right is just outside the triangle, and contains pixels at the borders. In this example you can draw a closed polygon with the mouse. The horz/vert polygon that follows the pixel edges along the oblique polygon lines are calculated, and pixels are selected. The horz/vert polygon can be calculated inside or outside the oblique polygon. The example is not limited to triangles. You can create a selection like this with 15 line segments: Program modes In Navigating in an image there is only one mode: View mode. To create a non-rectangular selection you have to switch to Polygon selection mode. Click button 3 below to switch mode. This will add a new Polygon selection toolbar. Click button 3 again to leave Polygon selection mode. A click in the title bar, the menu bar, a tab item, buttons in toolbar not related to Polygon selection, the free area of the toolbar or the status bar will also leave Polygon selection mode. Toolbar buttons The left group is the Copy/paste toolbar. A click on a button in Polygon selection mode will switch to View mode. 1) Copy selected pixels2) Paste as new imageThe middle group is the Select toolbar. The buttons are available both in View mode and in Polygon selection mode.3) Polygon selection4) Center selection5) Remove selection6) Selection colorsThe last group is the Polygon selection toolbar. This toolbar is only visible when button 3 is pressed.7) New polygon8) Recent polygons9) Polygons on opposite side of support lines10) Redraw polygons (after error or debug)11) Undo last support polygon action12) Redo last support polygon actionYou can right (secondary) click button 1, 6 and 8. Note that all toolbar buttons are provided with tooltips. In addition to colors that can be set with button 6, you can set colors for frame and grid. Right click the tab item to set all colors at once, that best fits bright and dark images. By default colors are set to fit a bright image. More details Draw a polygon To create a non-rectangular selection you just have to draw a non-rectangular polygon with the mouse. Nomenclature: The oblique polygon you draw with the mouse is called the support polygon. The polygons which follows the pixel edges along each oblique support line are called horizontal/vertical or horz/vert polygons. In the first illustration above you see a support polygon in the left picture, and a support polygon plus three horz/vert polygons in the two other pictures. A support polygon is drawn as a sequence of line segments. End point of previous line must be start point of next line. The polygon is finished, when end point of last line is equal to start point of first line. 1) First line segmentClick a start point with primary mouse button, drag line to an end point, release mouse button. 2) Next line segmentClick end point of previous line, drag line with mouse to end point of next line. Repeat this step as many times as needed. 3) Last line segmentClick end point of previous line, drag line with mouse to start point of first line. This illustration shows how to create a triangular selection. First line segment Zoom in to a sufficiently high level with the mouse wheelClick Polygon selection button to switch to Polygon selection modeClick New polygon button to create a new polygonCreate the first oblique support line with the mouseClick possibly "Polygons on opposite side of support lines" button to calculate and draw the horz/vert polygon on opposite side of the support lineThe default action when you drag with the mouse is to move the image. A click at the New polygon button disables the default action for the next drag operation, and you can create the first line segment. For the following line segments you have to start the dragging at an end line marker. Dragging outside an end line marker will move the image. Next line segment Move the mouse pointer over the marker at the end of the first line segmentThe pointer will change to a cross cursorCreate the next oblique support lineLast line segmentMove the pointer over one of the markers at the end of the two line segmentsThe pointer will change to a cross cursorCreate the last oblique support lineForce empty line after listMouse actions In Polygon selection mode you can still zoom in/out with the mouse wheel, drag/move the image, and click a point to zoom around this point. This is described in Navigating in an image. You can create a support polygon as explained above. In addition to these actions you can adjust line end points and corner points, move the entire support polygon, and delete a support line. To see which actions you can do, just hover the mouse pointer over a line marker, and you'll get information in a tooltip. Over a line marker the pointer will change to a cross cursor. When you click Polygon selection button, tooltips will be shown for the first few support lines. To adjust an end point of a support line or a corner point between two support lines press the Shift button, move the mouse pointer over the marker, click and drag the point. To move the entire polygon position the mouse pointer over a middle marker, click and drag the polygon. Note that this will move the polygon relative to the source image. If you have zoomed in to a factor 24 as in the image above, the polygon will be moved in steps af 24 pixels in the picture control. To delete a support line position the mouse pointer over a middle marker, right (secondary) click and click "Delete line segment" in the context menu. Only end lines can be deleted. For a finished polygon any line can be deleted, but as soon as one line is deleted, only end lines can be deleted. Keyboard actions You can use Page Up/Page Down to zoom in/out, arrow keys to move the image a pixel at a time, and Shift plus arrow keys to move the image a page at a time. Line validations If you are creating a selection as shown to the left, and have added line 0, 1 and 2 and are going to add line 3, it can happen that line 3 gets too close to line 0. This is an error, and you'll get a visual feedback as shown to the right. The end point of the line must not be inside the red region, and the line must not cross the red region. To get rid of the red lines/circles just recreate line 3 and make it a little shorter, or click Redraw polygons button. Several validations are performed on line segments in this order: 1) Line segments must not be too short2) Line segments must not be horizontal or vertical3) Angles between neighbor lines must not be too small or too large4) Start or end point of a new line must not be too close to neigbor segments5) Start and end point of a line must not be too close to other segments (the illustration above)To create selections with horizontal/vertical lines that doesn't violate point 2, you can do something like this: Array limits Array limits are not validated in this version. The limits are: Line segments in a support polygon: 25Points in a horizontal/vertical polygon along a support line: 2000Points in the final polygon (drawn with _GDIPlus_GraphicsDrawPolygon): 10000Force empty line after listDebug menu Right (secondary) click a middle marker to access the Debug menu. The illustration shows some of the features of the Debug menu. Picture 1 is a simple quadrilateral (polygon with four sides) with four horz/vert polygons inside the support polygon. Right (secondary) click the middle marker below the number and select Debug polygons | Draw this/next polygon | Entire polygons. The result is shown in picture 2. The horz/vert polygon for the current support line is blue, and the horz/vert polygon for the next support line is red. The picture shows the intersection point between the horz/vert polygons. In picture 3 (Debug polygons | Draw this/next polygon | Adjusted polygons) the part of the horz/vert polygons on the wrong side of the intersection point is cut off, and the adjusted polygons are shown. Picture 4 (Debug polygons | Show selected pixels) shows the selected pixels with a horizontal black line. View mode When you switch to View mode (click Polygon selection button or View mode button (arrow icon)), the separate horz/vert polygons along each of the oblique support lines are put together into one big closed polygon (which can be drawn with _GDIPlus_GraphicsDrawPolygon). The selected pixels are calculated from this final polygon, when you click the Copy button. Note that the middle markers are still visible, and you can drag/move the polygon around in the image. In this way you can copy/paste several different regions with the same polygon. Copy/paste Click Copy button to create a copy of the selected pixels on a white background. In the context menu for the Copy button, you can choose a red, green or blue background color. Click Paste button to paste selected pixels as a new image. The new image appears in a new tab item. In this version you can only paste the selected pixels as a new image. More details If you are interested, you can find more information about calculations and code for the following topics in posts below (I'll add the information in the course of a week, when I get my notes organized a little better.): Overview of the program progress in a flow chartHorizontal/vertical polygons along support linesCalculations related to zoom in/out issuesFinal polygon and selected pixelsForce empty line after listThis version This version is a test version to find out whether it's possible to carry out non-rectangular selections. Only functionality required for the test is coded. If you run the example in Scite, you can see a few warnings and error messages in the console. The code is not cleaned up according to double defined local variables or unused parameters in function calls (primary functions to handle windows messages). This means a lot of warnings if you run Au3Check. Zipfile The top level is the folder "Image Editor". It contains one subfolder: "2) Non-rectangular selections". The subfolder contains source and resource files. Most important source files are: Selections.au3 - run this scriptincludestoolsSelectPolygon.au3 - executes the message loop which runs when the program is in Polygon selection mode. The message loop handles drawing of the oblique support lines and responds to button clicks. In bottom of the file you find the function to draw the final polygon in View mode.includestoolsSelectPolygonFunctions1.au3 - utility functions. Functions to zoom in/out, to create the final polygon, and to extract the selected pixels.includestoolsSelectPolygonFunctions2.au3 - all functions to calculate, adjust and draw the horizontal/vertical polygons along the oblique support lines.includestoolsSelectPolygonValidations.au3 - functions to validate the oblique support lines.includestoolsSelectPolygonDebug.au3 - functions for the Debug menu.Tested with AutoIt 3.3.10 on Windows 7 32/64 bit and Windows XP 32 bit. Selections.7z This update fixes an issue. More information here. Selections2.7z1 point
-

Game Intro - Effects, Animation, Title Menu
argumentum reacted to minxomat for a topic
I made this a while ago for a game I was going to make. I don't see the game happening any time soon, so i might as well just share what I have done. The way animations are displayed in this is quite different, as each sprite is contained within a main TTF font. It also shows how to time Control-Based animations and how to rotate them. Advantages of font-based animations: Only one file for all animationsSprites can be scaled to any size as they are vector data (like SVGs)Sprites can be displayed in any color (or angle)The antialiasing can be varied very easily...You have to install all fonts to view this intro. Here, have a screenshot of the end: Download: Game Intro.zip1 point -
At least they can do some things right then eh Thankyou for taking the steps necessary for ensuring your image was localized.1 point
-
Hey. Do not despair, I also had a rough start, and I'm still not lightly write in a foreign , little known, language (yes I mean ENGLISH). edit: Cheer up, it will be better. mLipok1 point
-

Using a stop button to interrupt a function
InunoTaishou reacted to Melba23 for a topic
InunoTaishou, The Interrupting a running function tutorial in the Wiki should give you the answer. M231 point -

Using a stop button to interrupt a function
InunoTaishou reacted to BrewManNH for a topic
https://www.autoitscript.com/wiki/Interrupting_a_running_function1 point -
Or like this, with a recursive function and a shorthand if: $str = fix('00204070F48F') ConsoleWrite($str & @CRLF) Func fix($x) Return StringLen($x) == 2 ? $x : StringLeft($x, 2) & ":" & fix(StringMid($x, 3)) EndFunc1 point
-
If you made the right-click entry in the registry using something like this C:\my_cript.exe "%1" Then you can get the info you want in your script compiled using $CmdLine[1]1 point
-
So essentially you want to build a browser? If not, maybe it's time you use a browser if you want to use browser objects? Edit: I say this, because they have already done all that work for you.1 point
-
@Kyan, try this: Func _packH($sInput) Local $sReply = "" For $xx = 1 To StringLen($sInput) Step 2 $sReply &= Chr(Dec(StringMid($sInput, $xx, 2))) Next Return $sReply EndFunc ;==>_packH1 point
-
Trong, Use guinness' SciTE Jump utility (Alt-Q) to list and export the names. And use Au3Stripper with the /RM parameter and all you functions and variables are automatically set to 2/3-character names. M231 point
-

regular expression is not found in dictionary?
TheAutomator reacted to SadBunny for a topic
I'm not 100% sure about COM object handling in AutoIt, but I guess the problem is that AutoIt has no way to know what field or method to call from the generic COM object to get the toString value. VBScript is quite a different language. Object oriented, for one. In this case, the RegExp.execute() method returns an object of the type MatchCollection which then your iterator "part" goes through. I guess there is auto-invocation of the .Value getter/field (don't know how that works in VBscript, never used it) when you access it as a string. I.e. it works not because part equals "=", but because the string auto-invoked string representation equals "=". Note that this is mostly guesswork, mostly based on the example this link: http://www.regular-expressions.info/vb.html1 point -

regular expression is not found in dictionary?
TheAutomator reacted to SadBunny for a topic
$part is not the thing that equals "=", $part.Value is. MsgBox(0, 4, $test.exists($part.Value)) ;this should be true!1 point -
Charon, Like this: #include <MsgBoxConstants.au3> ; Assign a Local variable the hex number representation of 1033. $x = 0x204070F484 $x += 1 ; Display the result. MsgBox($MB_SYSTEMMODAL, "", "0x" & Hex($x, 10)) M231 point
-
Be sure to grab the most recent update from >here.1 point
-
@czardas (etc) - It is my view, that we should probably extend the voting time, as we are not getting many votes, and I see no need to rush this important process. I also discovered something disappointing, which I >mentioned here. P.S. Questioning whether we MVP's can vote in this, after noticing BrewManNH had done so, I went back and read your first post. Obviously he missed the following. Perhaps he was voting for the loser? Personally though, perhaps everyone should get a chance to vote in this?1 point
-
Zohar, Of course it is possible - complicated, but possible: #include <GUIConstantsEx.au3> #include <Array.au3> #include <WinAPI.au3> $hGUI = GUICreate("Test", 500, 500) $cButton = GUICtrlCreateButton("Test", 10, 10, 80, 30) GUISetState() ; Using ControlGetPos $aControlGetPos = ControlGetPos($hGUI, "", $cButton) _ArrayDisplay($aControlGetPos, "ControlGetPos", Default, 8) ; Get handle $hHandle = GUICtrlGetHandle($cButton) ; But using WinGetPos gives you absolute coords $aWinGetPos = WinGetPos($hHandle) _ArrayDisplay($aWinGetPos, "WinGetPos - Basic", Default, 8) ; So you need to convert them to client coords Local $tPoint = DllStructCreate("int X;int Y") DllStructSetData($tPoint, "X", $aWinGetPos[0]) DllStructSetData($tPoint, "Y", $aWinGetPos[1]) _WinAPI_ScreenToClient($hGUI, $tPoint) $aWinGetPos[0] = DllStructGetData($tPoint, "X") $aWinGetPos[1] = DllStructGetData($tPoint, "Y") _ArrayDisplay($aWinGetPos, "WinGetPos - Converted", Default, 8) While 1 Switch GUIGetMsg() Case $GUI_EVENT_CLOSE Exit EndSwitch WEnd M231 point
-
kylomas, [w.]+ matches word chars and dot (which doesn't need to be escaped in a character class) only, while .+ matches anything Edit BTW it could be done also like this "//([^/]+)"1 point
-
Then a strict replace is the best Local $str = 'something_123_2015_02_15_12_else_02.log' Msgbox(0,"", stringregexpreplace($str, '.*(\d{4})_(\d{2})_(\d{2}).*', "$1/$2/$3") )1 point
-
1 point
-
@mikell - Yes, the example is based on post #5 where the OP is using a URL... #include <ie.au3> $oIE = _IECreate('http://www.autoitscript.com/forum/topic/167636-list-of-link/',0,0,1) $oLNKS = _IELinkGetCollection($oIE) if isobj($oLNKS) then for $oLNK in $oLNKS ConsoleWrite($oLNK.href & @CRLF) Next endif The function is indeed returning more than I expected, stuff like this... which I have no clue as to what it is. However, it is easy enough to post process the output to eliminate these.1 point
-
kylomas, _IELinkGetCollection matches <a> and area <area> in the text and fails on the string provided in post #1 Edit This one is (a little) better #Include <Array.au3> #include <Inet.au3> $txt = _INetGetSource('http://www.autoitscript.com/forum/topic/167636-list-of-link/') ; source $res = StringRegExp($txt, '((?:https?:/|ftp:/|(?<=src=''|''\.))[^<''";\r\n]{10,})', 3) _ArrayDisplay($res)1 point
-
I vote for #6 because it show the simplicity of AutoIt, All the other examples are hard to understand for beginners (incl me)1 point
-
You can download it >here, also you need this1 point
-
Well, they'd work, but they could be slightly stricter. The first one, for instance, would let PP, PA, AP, AA, MP and MA pass as well. "[PA]M" instead of "[PAM]{2}" would be better. And the second one would allow for a time 99:99:99, a date "99-xlZ-9998". How about: $Date2Pattern="^([0-3]?[0-9]-(Jan|Feb|Mar|Apr|May|Jun|Jul|Aug|Sep|Oct|Nov|Dec)-\d{4} [0-2][0-9]:[0-5][0-9]:[0-5][0-9])\z" It still allows for 39 feb but it's a lot stricter. You could prefix the pattern with (?i) to make it case insensitive. /edit: you can use this crude approach if you know what you're looking for in what data and that the chance for false positives is zero. Or if you know that false positives aren't problematic, like if you're grepping through application logfiles, though it's bad logging if it doesn't match year->month->day->hour->min->sec(->msec) But if you need to have 100% matching you would need a much more cumbersome regex or, better in this case, some extra parsing and error checking (like matching these crude regexes, then taking the string apart, putting it into "YYYY/MM/DD[ HH:MM:SS]" format and checking whether _DateTimeFormat can make sense of it.1 point
-
Trong, Using the IE* library... #include <ie.au3> $oIE = _IECreate('http://www.google.com',0,0,1) $oLNKS = _IELinkGetCollection($oIE) if isobj($oLNKS) then for $oLNK in $oLNKS ConsoleWrite($oLNK.href & @CRLF) Next endif kylomas1 point
-
1 point
-
$Money1 = "£22.50" $Money2 = "£6.00" $Money3 = "£22.50x" $MoneyPattern = "(£\d+\.\d\d\z)" $match = StringRegExp($Money1, $MoneyPattern, 0) ? msgbox(0, '' , $Money1) : msgbox(0, '' , 'no match found') $match = StringRegExp($Money2, $MoneyPattern, 0) ? msgbox(0, '' , $Money2) : msgbox(0, '' , 'no match found') $match = StringRegExp($Money3, $MoneyPattern, 0) ? msgbox(0, '' , $Money3) : msgbox(0, '' , 'no match found')1 point
-

RegExp (£n.nn) test
JohnOne reacted to jaberwacky for a topic
This one works for me in your example. Haven't done any exhaustive testing. "^£\d+\.\d{2}" The ^ means that the pound sign will appear at the beginning. The {2} means there have to be 2 numbers. Edit: Seems that {2} isn't limiting the regex to exactly 2 numbers. Edit: This will allow an x but won't limit it to one for some reason: "^£\d+\.\d{2}x{0,1}" Edit: Allright, well, I'm off the mark, but that's a start.1 point -
Maybe... #Include <Array.au3> $txt = FileRead("1.txt") ; source $res = StringRegExp($txt, '((?:https?|ftp|(?<=src=''|''\.))[^''"]{10,})', 3) _ArrayDisplay($res)1 point
-
Global $xString="StringFun($StringVarA["&Random(1,9999999,1)&"], " & Random(111,999,1) & ")" ConsoleWrite($xString & @CRLF) $yYourNewNumber = StringMid($xString, 24, 3 ) ConsoleWrite(" Your New Number" & "=" & $yYourNewNumber & @CRLF) StringFun($StringVarA[5091283], 535) Your New Number=0911 point
-
@Jos: The fisherman wont tell the fish why he needs worms If seriously, I have an idea of creating autoit based av, which can analyze the code of malware by the bytes of code1 point
-
Good point. Unfortunately, as far I can see a small number of votes. I hope that after the vote, no one will have, to me resentment. Because I think they (examples) are all interesting and good, but I could only choose one.1 point
-
Try simplifying it (well, this reads easier for me than yours at least, it may not for others): #include <IE.au3> #include <MsgBoxConstants.au3> #include <INet.au3> $file = "c:\servers.txt" ; splitting up the file into lines Global $gaURLs = StringSplit(StringStripCR(FileRead($file)), @LF) ; putting words to find in an array Global $gaWords[2] = ["word1", "word2"] Global $gsSource = "" ; create match pattern for regex engine Global $gsFind = "(?si)" For $words = 0 To UBound($gaWords) - 1 $gsFind &= "\Q" & $gaWords[$words] & "\E|" Next $gsFind = StringTrimRight($gsFind, 1) For $i = 1 To $gaURLs[0] $gsSource = _INetGetSource($gaURLs[$i]) If StringRegExp($gsSource, $gsFind) Then ; found MsgBox(0, 0, "Data found") EndIf Next .1 point
-
Set values how you like. Hint: They will affect the outcome Download: https://gist.github.com/minxomat/8b2d78b232b9f8186a031 point
-

DARTIS (Dimension And Relative Time Information System)
FrodoKemp reacted to nullschritt for a topic
This thread never held any code and served no useful purpose other than to try and build up audience anticipation for a future commercial release. That is not what the Examples sections is for - it is to showcase what AutoIt can do. As a result the other posts in this thread have been deleted and only this comment remains. M231 point -

Open file via Drag'n'Drop on GUI
jaberwacky reacted to Melba23 for a topic
blumi, Here is some code to do what you want - credit goes to ProgAndy who showed me how to do it: #include <Array.au3> #include <GUIConstantsEx.au3> Global $gaDropFiles[1], $iDropItem = -1 Global $WM_DROPFILES = 0x233 GUICreate("DropIt", 241, 312, @DesktopWidth / 2 - 160, @DesktopHeight / 2 - 45, -1, 0x00000018); WS_EX_ACCEPTFILES $FILES_DROPPED = GUICtrlCreateDummy() GUISetState() GUIRegisterMsg($WM_DROPFILES, 'WM_DROPFILES_FUNC') While True Switch GUIGetMsg() Case $GUI_EVENT_CLOSE ExitLoop Case $FILES_DROPPED $aFiles = $gaDropFiles _ArrayDisplay($aFiles) EndSwitch WEnd Func WM_DROPFILES_FUNC($hWnd, $msgID, $wParam, $lParam) Local $nSize, $pFileName Local $nAmt = DllCall('shell32.dll', 'int', 'DragQueryFileW', 'hwnd', $wParam, 'int', 0xFFFFFFFF, 'ptr', 0, 'int', 0) ReDim $gaDropFiles[$nAmt[0]] For $i = 0 To $nAmt[0] - 1 $nSize = DllCall('shell32.dll', 'int', 'DragQueryFileW', 'hwnd', $wParam, 'int', $i, 'ptr', 0, 'int', 0) $nSize = $nSize[0] + 1 $pFileName = DllStructCreate('wchar[' & $nSize & ']') DllCall('shell32.dll', 'int', 'DragQueryFileW', 'hwnd', $wParam, 'int', $i, 'ptr', DllStructGetPtr($pFileName), 'int', $nSize) $gaDropFiles[$i] = DllStructGetData($pFileName, 1) $pFileName = 0 Next GUICtrlSendToDummy($FILES_DROPPED, $nAmt[0]) EndFunc ;==>WM_DROPFILES_FUNC M231 point -
Tried with a RichEdit Control Till the time it works #include-once #include <GuiRichEdit.au3> #include <GUIConstantsEx.au3> #include <WindowsConstants.au3> #include <GDIPlus.au3> Main() Func Main() Local $hGui, $hRichEdit, $iMsg $hGui = GUICreate("Example (" & StringTrimRight(@ScriptName, 4) & ")", 320, 350, -1, -1, 0, $WS_EX_COMPOSITED) $hRichEdit = _GUICtrlRichEdit_Create($hGui, "This is a a transparent Rich Edit Control." & @CRLF & _ "Press Esc To Exit", 10, 10, 300, 220, BitOR($ES_MULTILINE, $ES_AUTOVSCROLL), $WS_EX_TRANSPARENT) CreateBackground_Static($hGui, 0, 0) GUISetState() While True Switch GUIGetMsg() Case $GUI_EVENT_CLOSE ExitLoop EndSwitch WEnd _GUICtrlRichEdit_Destroy($hRichEdit) GUIDelete() EndFunc ;==>Main Func CreateBackground_Static($hWnd, $iX, $iY, $iWidth = -1, $iHeight = -1, $iColor_Start = 0xAA000000, $iColor_End = 0x70000000, $iMode = 1) _GDIPlus_Startup() If $iWidth < 0 Then $iWidth = _WinAPI_GetWindowWidth($hWnd) If $iHeight < 0 Then $iHeight = _WinAPI_GetWindowHeight($hWnd) $hGraphic = _GDIPlus_GraphicsCreateFromHWND($hWnd) $hBitmap = _GDIPlus_BitmapCreateFromGraphics($iWidth, $iHeight, $hGraphic) _GDIPlus_GraphicsDispose($hGraphic) $hGraphic = _GDIPlus_ImageGetGraphicsContext($hBitmap) ;********************** ; Create Line Brush Using minimum number of settings- Brush size same size as Rectangle to fill $hBrushLin = GDIPlus_CreateLineBrushFromRect(0, 0, $iWidth, $iHeight, -1, -1, $iColor_Start, $iColor_End, 1) ;Fill a rectangle using the above brush _GDIPlus_GraphicsFillRect($hGraphic, 0, 0, $iWidth, $iHeight, $hBrushLin) ;*************************** Local Const $_STM__SETIMAGE = 0x0172, $_SS__BITMAP = 0x0E $hHBitmap = _GDIPlus_BitmapCreateHBITMAPFromBitmap($hBitmap) $iRet = GUICtrlCreatePic('', $iX, $iY, $iWidth, $iHeight, $_SS__BITMAP) Local Const $__IMAGE_BITMAP = 0 GUICtrlSendMsg(-1, $_STM__SETIMAGE, $__IMAGE_BITMAP, $hHBitmap) _GDIPlus_GraphicsDispose($hGraphic) _WinAPI_DeleteObject($hHBitmap) _GDIPlus_Shutdown() GUICtrlSetState(-1, $GUI_DISABLE) Return $iRet EndFunc ;==>CreateBackground_Static Func GDIPlus_CreateLineBrushFromRect($iX, $iY, $iWidth, $iHeight, $aFactors, $aPositions, _ $iArgb1 = 0xFF0000FF, $iArgb2 = 0xFFFF0000, $LinearGradientMode = 0x00000001, $WrapMode = 0) Local $tRect, $pRect, $aRet, $tFactors, $pFactors, $tPositions, $pPositions, $iCount If $iArgb1 = -1 Then $iArgb1 = 0xFF0000FF If $iArgb2 = -1 Then $iArgb2 = 0xFFFF0000 If $LinearGradientMode = -1 Then $LinearGradientMode = 0x00000001 If $WrapMode = -1 Then $WrapMode = 1 $tRect = DllStructCreate("float X;float Y;float Width;float Height") $pRect = DllStructGetPtr($tRect) DllStructSetData($tRect, "X", $iX) DllStructSetData($tRect, "Y", $iY) DllStructSetData($tRect, "Width", $iWidth) DllStructSetData($tRect, "Height", $iHeight) ;Note: Withn _GDIPlus_Startup(), $ghGDIPDll is defined $aRet = DllCall($ghGDIPDll, "int", "GdipCreateLineBrushFromRect", "ptr", $pRect, "int", $iArgb1, _ "int", $iArgb2, "int", $LinearGradientMode, "int", $WrapMode, "int*", 0) If IsArray($aFactors) = 0 Then Dim $aFactors[4] = [0.0, 0.4, 0.6, 1.0] If IsArray($aPositions) = 0 Then Dim $aPositions[4] = [0.0, 0.3, 0.7, 1.0] $iCount = UBound($aPositions) $tFactors = DllStructCreate("float[" & $iCount & "]") $pFactors = DllStructGetPtr($tFactors) For $iI = 0 To $iCount - 1 DllStructSetData($tFactors, 1, $aFactors[$iI], $iI + 1) Next $tPositions = DllStructCreate("float[" & $iCount & "]") $pPositions = DllStructGetPtr($tPositions) For $iI = 0 To $iCount - 1 DllStructSetData($tPositions, 1, $aPositions[$iI], $iI + 1) Next $hStatus = DllCall($ghGDIPDll, "int", "GdipSetLineBlend", "hwnd", $aRet[6], _ "ptr", $pFactors, "ptr", $pPositions, "int", $iCount) Return $aRet[6] ; Handle of Line Brush EndFunc ;==>GDIPlus_CreateLineBrushFromRect Better Example #include-once #include <GuiRichEdit.au3> #include <GUIConstantsEx.au3> #include <WindowsConstants.au3> #include <GDIPlus.au3> #include <Constants.au3> Main() Func Main() Local $hGui, $hRichEdit, $iMsg $hGui = GUICreate("Example (" & StringTrimRight(@ScriptName, 4) & ")", 320, 350, -1, -1, 0, $WS_EX_COMPOSITED) If FileExists(@ScriptDir & "\cute.jpg") = 0 Then InetGet("http://www.picgifs.com/graphics/c/cute/graphics-cute-920618.jpg", @ScriptDir & "\cute.jpg") If @error Then Exit 1 _GDIPlus_Startup() Local $hBitmap = _GDIPlus_BitmapCreateFromFile(@ScriptDir & "\cute.jpg") $hRichEdit = _GUICtrlRichEdit_Create($hGui, @CRLF & @CRLF & "This is a a transparent Rich Edit Control." & @CRLF & _ "Press Esc To Exit" & @CRLF & @CRLF & "Phoenix XL", 10, 190, 280, 80, BitOR($ES_MULTILINE, $ES_AUTOVSCROLL), $WS_EX_TRANSPARENT) CreateBackground_Static($hGui, 10, 190, 280, 80) ;comment this to get pure transparency CreateBackground_Static($hGui, 0, 0, 320, 350, $hBitmap) _GDIPlus_BitmapDispose($hBitmap) GUISetState() While True Switch GUIGetMsg() Case $GUI_EVENT_CLOSE ExitLoop EndSwitch WEnd _GUICtrlRichEdit_Destroy($hRichEdit) _GDIPlus_Shutdown() GUIDelete() EndFunc ;==>Main Func CreateBackground_Static($hWnd, $iX, $iY, $iWidth = -1, $iHeight = -1, $hBitmap = 0, $iColor_Start = 0xAA000000, $iColor_End = 0x70000000, $iMode = 1) If $iWidth < 0 Then $iWidth = _WinAPI_GetWindowWidth($hWnd) If $iHeight < 0 Then $iHeight = _WinAPI_GetWindowHeight($hWnd) Local $hGraphic If $hBitmap = 0 Then $hGraphic = _GDIPlus_GraphicsCreateFromHWND($hWnd) $hBitmap = _GDIPlus_BitmapCreateFromGraphics($iWidth, $iHeight, $hGraphic) _GDIPlus_GraphicsDispose($hGraphic) $hGraphic = _GDIPlus_ImageGetGraphicsContext($hBitmap) ;********************** ; Create Line Brush Using minimum number of settings- Brush size same size as Rectangle to fill Local $hBrushLin = GDIPlus_CreateLineBrushFromRect(0, 0, $iWidth, $iHeight, -1, -1, $iColor_Start, $iColor_End, 1) ;Fill a rectangle using the above brush _GDIPlus_GraphicsFillRect($hGraphic, 0, 0, $iWidth, $iHeight, $hBrushLin) ;*************************** EndIf Local Const $_STM__SETIMAGE = 0x0172, $_SS__BITMAP = 0x0E Local $hHBitmap = _GDIPlus_BitmapCreateHBITMAPFromBitmap($hBitmap) $iRet = GUICtrlCreatePic('', $iX, $iY, $iWidth, $iHeight, $_SS__BITMAP) Local Const $__IMAGE_BITMAP = 0 GUICtrlSendMsg(-1, $_STM__SETIMAGE, $__IMAGE_BITMAP, $hHBitmap) If $hGraphic Then _GDIPlus_GraphicsDispose($hGraphic) _WinAPI_DeleteObject($hHBitmap) GUICtrlSetState(-1, $GUI_DISABLE) Return $iRet EndFunc ;==>CreateBackground_Static Func GDIPlus_CreateLineBrushFromRect($iX, $iY, $iWidth, $iHeight, $aFactors, $aPositions, _ $iArgb1 = 0xFF0000FF, $iArgb2 = 0xFFFF0000, $LinearGradientMode = 0x00000001, $WrapMode = 0) Local $tRect, $pRect, $aRet, $tFactors, $pFactors, $tPositions, $pPositions, $iCount If $iArgb1 = -1 Then $iArgb1 = 0xFF0000FF If $iArgb2 = -1 Then $iArgb2 = 0xFFFF0000 If $LinearGradientMode = -1 Then $LinearGradientMode = 0x00000001 If $WrapMode = -1 Then $WrapMode = 1 $tRect = DllStructCreate("float X;float Y;float Width;float Height") $pRect = DllStructGetPtr($tRect) DllStructSetData($tRect, "X", $iX) DllStructSetData($tRect, "Y", $iY) DllStructSetData($tRect, "Width", $iWidth) DllStructSetData($tRect, "Height", $iHeight) ;Note: Withn _GDIPlus_Startup(), $ghGDIPDll is defined $aRet = DllCall($ghGDIPDll, "int", "GdipCreateLineBrushFromRect", "ptr", $pRect, "int", $iArgb1, _ "int", $iArgb2, "int", $LinearGradientMode, "int", $WrapMode, "int*", 0) If IsArray($aFactors) = 0 Then Dim $aFactors[4] = [0.0, 0.4, 0.6, 1.0] If IsArray($aPositions) = 0 Then Dim $aPositions[4] = [0.0, 0.3, 0.7, 1.0] $iCount = UBound($aPositions) $tFactors = DllStructCreate("float[" & $iCount & "]") $pFactors = DllStructGetPtr($tFactors) For $iI = 0 To $iCount - 1 DllStructSetData($tFactors, 1, $aFactors[$iI], $iI + 1) Next $tPositions = DllStructCreate("float[" & $iCount & "]") $pPositions = DllStructGetPtr($tPositions) For $iI = 0 To $iCount - 1 DllStructSetData($tPositions, 1, $aPositions[$iI], $iI + 1) Next $hStatus = DllCall($ghGDIPDll, "int", "GdipSetLineBlend", "hwnd", $aRet[6], _ "ptr", $pFactors, "ptr", $pPositions, "int", $iCount) Return $aRet[6] ; Handle of Line Brush EndFunc ;==>GDIPlus_CreateLineBrushFromRect1 point
-
You have become a nuisance and are perturbing the smooth running of this forum with your multiple incoherent posts. Furthermore you have now reposted a question from a thread that has already been locked - and as a result of your general behaviour you can hardly expect any leniency on our part, so you can guess what comes next. Over the next week when you will be unable to post, think on how you might change your behaviour to better blend in with the community here - because if you continue in your current vein you will not be a member of it for much longer. M231 point
-
Check the helpfile for GUICreate, about topmost your have to use $WS_EX_TOPMOST bits as extended style. You have to press ALT+F4 for closing this... #NoTrayIcon #include <GUIConstants.au3> GUICreate("My GUI", 150, 30, -1, -1, BitOr($WS_BORDER, $WS_POPUP), BitOR($WS_EX_TOPMOST, $WS_EX_TOOLWINDOW)) GUISetState (@SW_SHOW) ;Just add a picture... While 1 $msg = GUIGetMsg() If $msg = $GUI_EVENT_CLOSE Then ExitLoop Wend1 point
-
1 point

